
You use an Apple TV for digital signage by installing a signage app on the device, connecting it to your signage dashboard, and assigning playlists or schedules to display on the screen.
While Apple TV is best known for streaming shows and movies, its processing power, reliability, and App Store support make it an effective digital signage player as well. With PosterBooking, you can transform any Apple TV into a professional signage screen and manage content remotely from your dashboard.
This guide will walk you step by step through the process, from preparing your Apple TV to scheduling content, plus best practices to make the most of Apple TV for digital signage in 2025.
Table Of Contents
- Step 1: Gather Your Requirements
- Step 2: Set Up Your Apple TV
- Step 3: Install the PosterBooking App
- Step 4: Log In to the PosterBooking Dashboard
- Step 5: Add the Apple TV to Your Account
- Step 6: Upload Your Content
- Step 7: Create a Playlist
- Step 8: Assign Playlist to Your Apple TV
- Step 9: Add a Schedule (Optional but Powerful)
- Step 10: Test and Confirm
- Best Practices for Using Apple TV for Digital Signage
- Why Apple TV is a Strong Choice for Digital Signage
- Final Thoughts
Step 1: Gather Your Requirements
Before starting, ensure you have the following:
- Apple TV device PosterBooking works with Apple TV 4K or Apple TV HD models (with App Store support). Older Apple TV devices without App Store access cannot be used.
- A display screen A TV or monitor with an HDMI port. Apple TV connects via HDMI.
- Internet connection Apple TV requires Wi-Fi or Ethernet to download apps and receive content updates from PosterBooking.
- PosterBooking account Sign up at posterbooking.co.uk/login. The free plan includes 10 screens, which is ideal for testing or running small deployments.
- Content files ready Prepare your images, videos, or URLs for uploading once the Apple TV is connected.
Having everything ready in advance prevents interruptions during setup.
Step 2: Set Up Your Apple TV

Before installing the signage app, configure your Apple TV:
- Plug the Apple TV into your screen using an HDMI cable.
- Connect the power supply and turn on the device.
- Pair the Apple TV remote as prompted.
- Connect to your Wi-Fi network or Ethernet.
- Sign in with your Apple ID (required to download apps).
At this point, your Apple TV is functioning like a standard streaming device and ready to install apps.
Step 3: Install the PosterBooking App
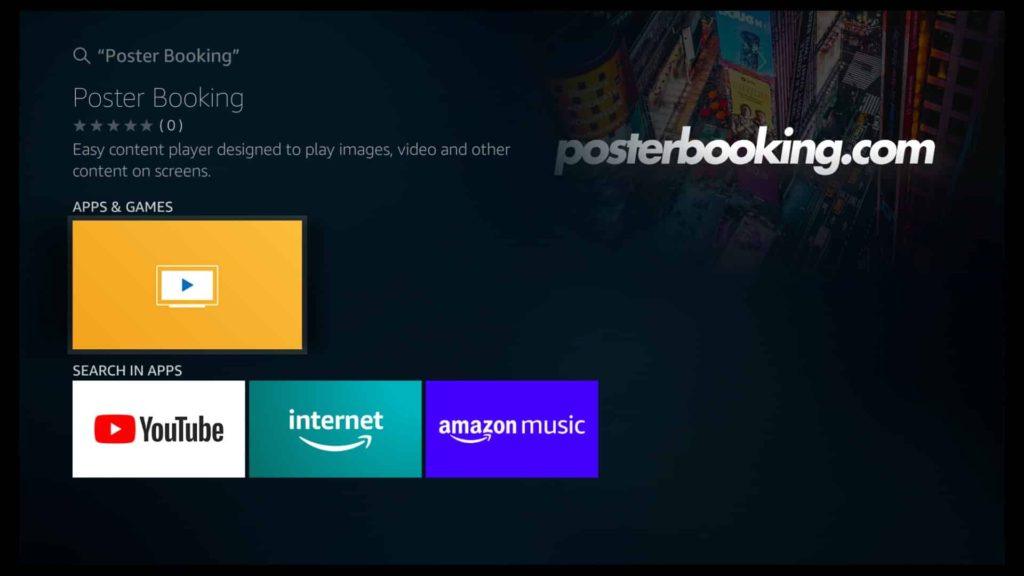
PosterBooking provides an app optimized for Apple TV through the App Store.
- On your Apple TV, open the App Store.
- Search for PosterBooking.
- Download and install the app.
- Launch the app once installed.
When you first open PosterBooking, the app will display a unique pairing code. Keep this visible on the screen - you will need it to link the Apple TV to your PosterBooking dashboard.
Step 4: Log In to the PosterBooking Dashboard
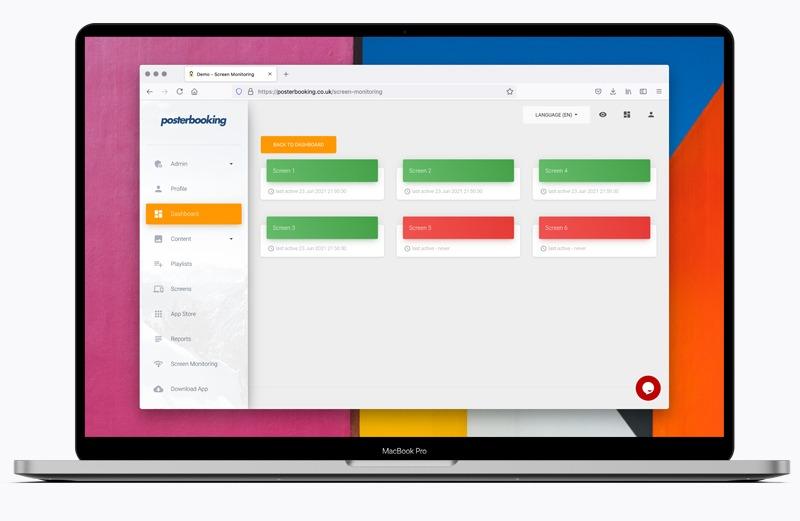
On your computer, tablet, or smartphone:
- Go to posterbooking.co.uk/login.
- Log in with your account credentials.
- From the left-hand menu, click on Screens.
- Select Add Screen.
This is where you’ll link your Apple TV device to your account.
Step 5: Add the Apple TV to Your Account
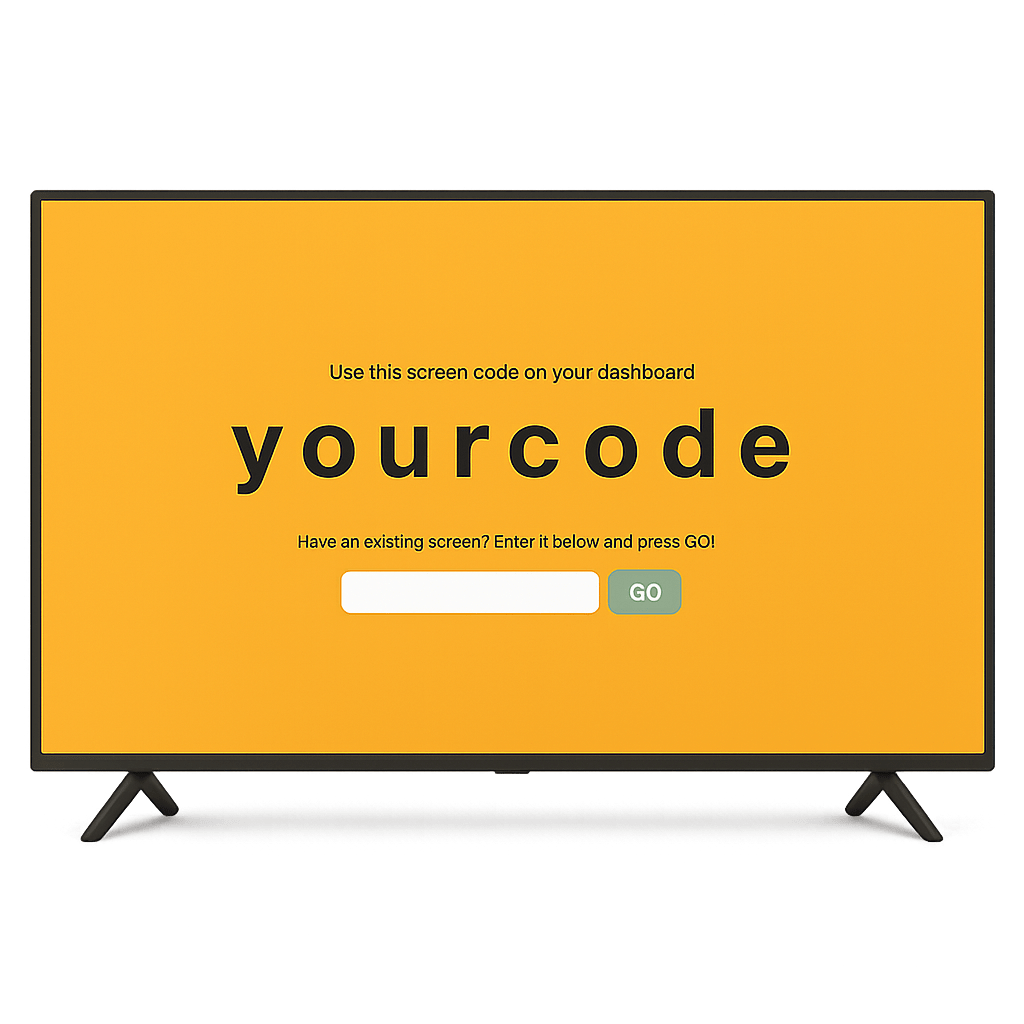
- Enter the pairing code displayed on your Apple TV.
- Assign a descriptive name to the screen (e.g., “Lobby Display,” “Classroom Board,” or “Retail Window”).
- Click Add Screen.
Your Apple TV is now officially part of your PosterBooking signage network and will appear under your list of screens in the dashboard.
Step 6: Upload Your Content
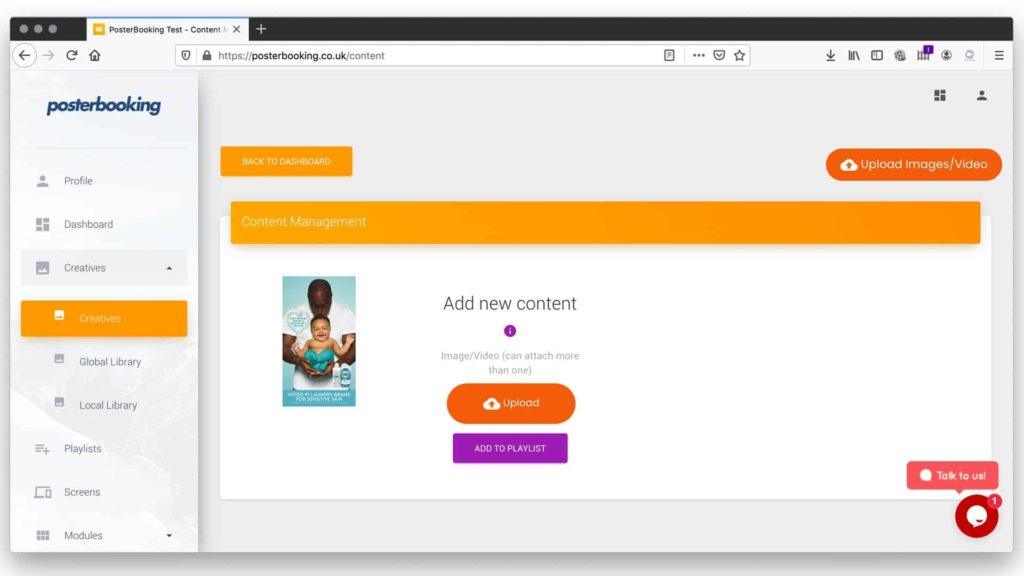
Now it’s time to prepare the visuals that will run on your Apple TV.
- Go to the Content section in your dashboard.
- Select Images/Videos to upload files such as MP4 videos, JPG, or PNG images.
- If you want live web content, dashboards, or Google Slides, go to Websites and paste the URL.
- Organize your uploads by folders for easier management, especially if you’re running multiple campaigns.
Your content is now ready to be included in playlists.
Step 7: Create a Playlist
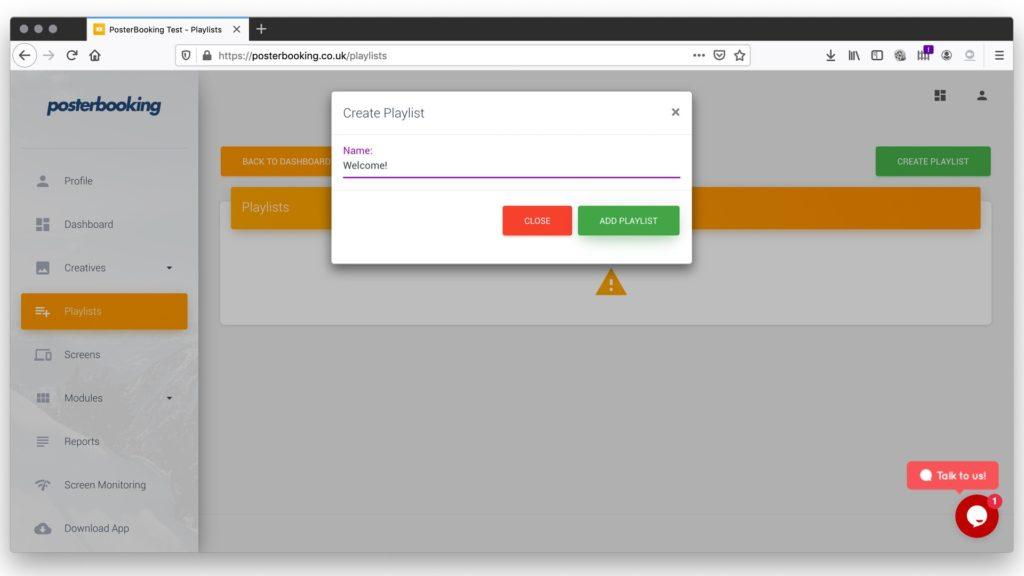
Playlists define the order and duration of your content.
- Go to the Playlists tab.
- Click Create Playlist and give it a clear name (e.g., “Morning Announcements” or “Restaurant Menu”).
- Add the content you uploaded earlier.
- Configure durations - for example, keep menu slides for 15 seconds each and let videos run in full.
- Save the playlist.
Playlists give you the flexibility to run multiple types of content on your Apple TV seamlessly.
Step 8: Assign Playlist to Your Apple TV
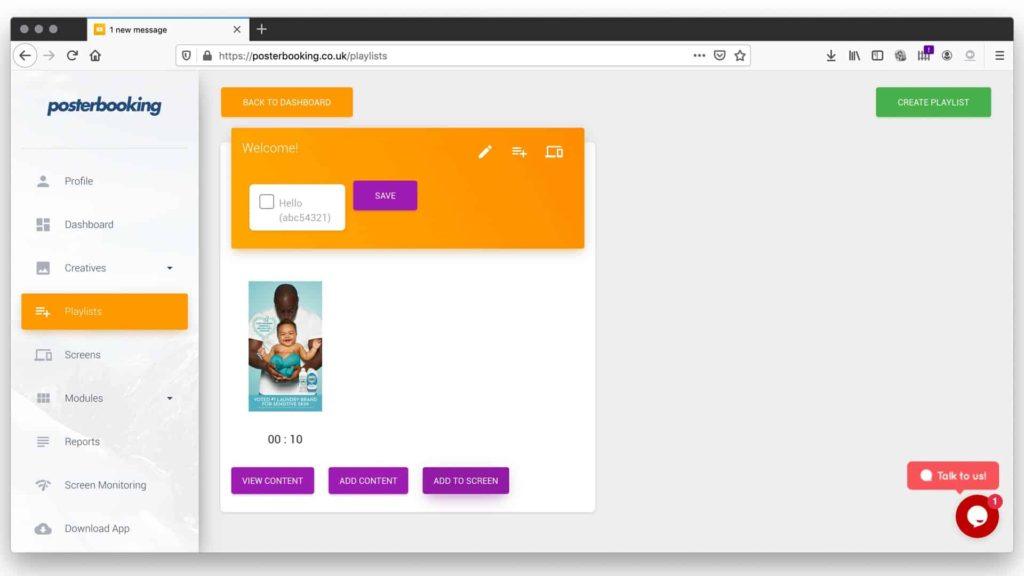
With your playlist ready:
- Return to the Screens tab.
- Find the Apple TV screen you just added.
- Click Add/Edit Playlist.
- Select the playlist you created.
- Save it.
Your Apple TV will update instantly, and your content will begin displaying on the connected screen.
Step 9: Add a Schedule (Optional but Powerful)
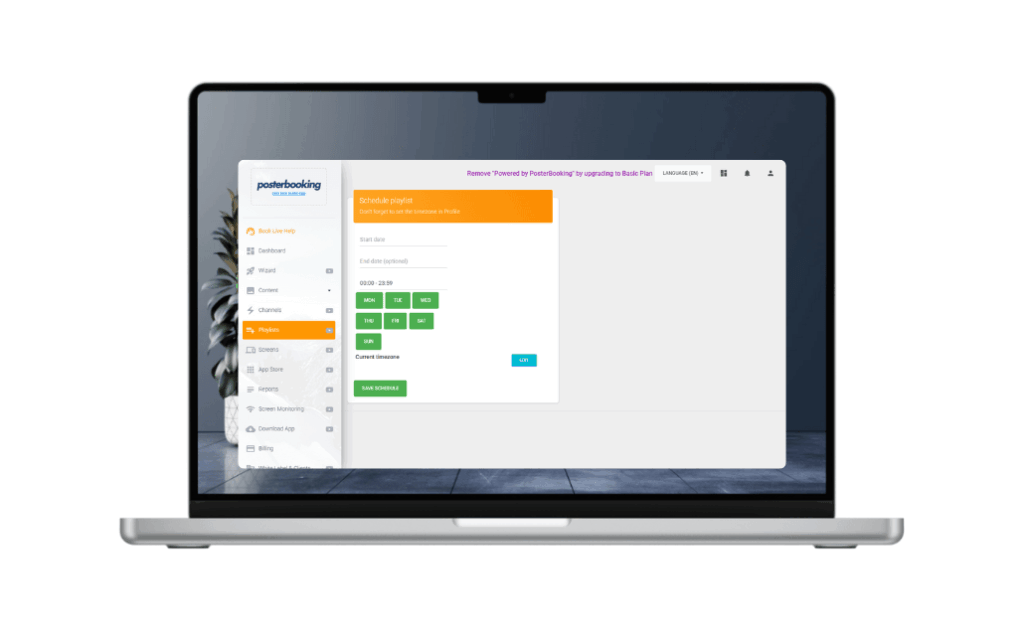
Scheduling allows you to control when certain content appears on your screen. For example:
- Breakfast menus in the morning
- Lunch specials at noon
- Evening promotions after 5 PM
To schedule content:
- In the Screens tab, click Schedule next to your Apple TV.
- Select the playlist you want.
- Define the start and end times and days of the week.
- Save your schedule.
Your Apple TV will now automatically switch playlists based on your schedule.
Step 10: Test and Confirm
Always test your setup before going live:
- Content check: Ensure all images and videos display correctly.
- Timing check: Verify playlist durations and scheduled transitions work.
- Sound check: If you’re running videos with audio, confirm volume levels are appropriate.
- Connection check: Make sure your Apple TV maintains a strong Wi-Fi or Ethernet connection for updates.
PosterBooking updates happen instantly, so any issues can be fixed quickly in the dashboard.
Best Practices for Using Apple TV for Digital Signage
- Name your screens clearly If you’re managing multiple Apple TVs, avoid generic names. Use specific labels like “Entrance Screen” or “West Wing Display.”
- Use schedules for relevance Time-specific content (like menus, promotions, or events) engages viewers better than static all-day slides.
- Keep content fresh Update visuals weekly or monthly to prevent screen fatigue for regular visitors.
- Plan for scaling PosterBooking’s free plan supports up to 10 Apple TVs. If you want to expand, upgrade to Business Pro for unlimited screens.
- Test often Especially when scheduling, always double-check transitions between playlists to avoid gaps or overlaps.
Why Apple TV is a Strong Choice for Digital Signage
While Firesticks and Android devices are common signage players, Apple TV has its own strengths:
- High performance: Apple TV hardware is powerful, ensuring smooth video playback without lag.
- App Store support: Easy access to the PosterBooking app and updates.
- Stable ecosystem: Apple’s reliability and regular software updates make it long-lasting.
- Professional look: Apple TV is sleek and fits into modern business environments without bulky hardware.
Apple TVs are slightly more expensive than Firesticks or Android boxes, but for businesses already using Apple products, they integrate seamlessly.
Final Thoughts
You use an Apple TV for digital signage by installing the PosterBooking app, linking it to your account with the pairing code, uploading content, creating playlists, and assigning them to the device. Adding schedules gives you even more control, ensuring the right content plays at the right time.
Apple TV is a strong option for businesses that value reliability, smooth playback, and Apple’s ecosystem. Combined with PosterBooking’s free plan (10 screens) and Business Pro upgrade options, it’s possible to run a scalable and professional signage network without high costs.
Whether you’re setting up a single Apple TV in a café or dozens across classrooms, PosterBooking and Apple TV together give you everything you need for modern, easy-to-manage digital signage.