
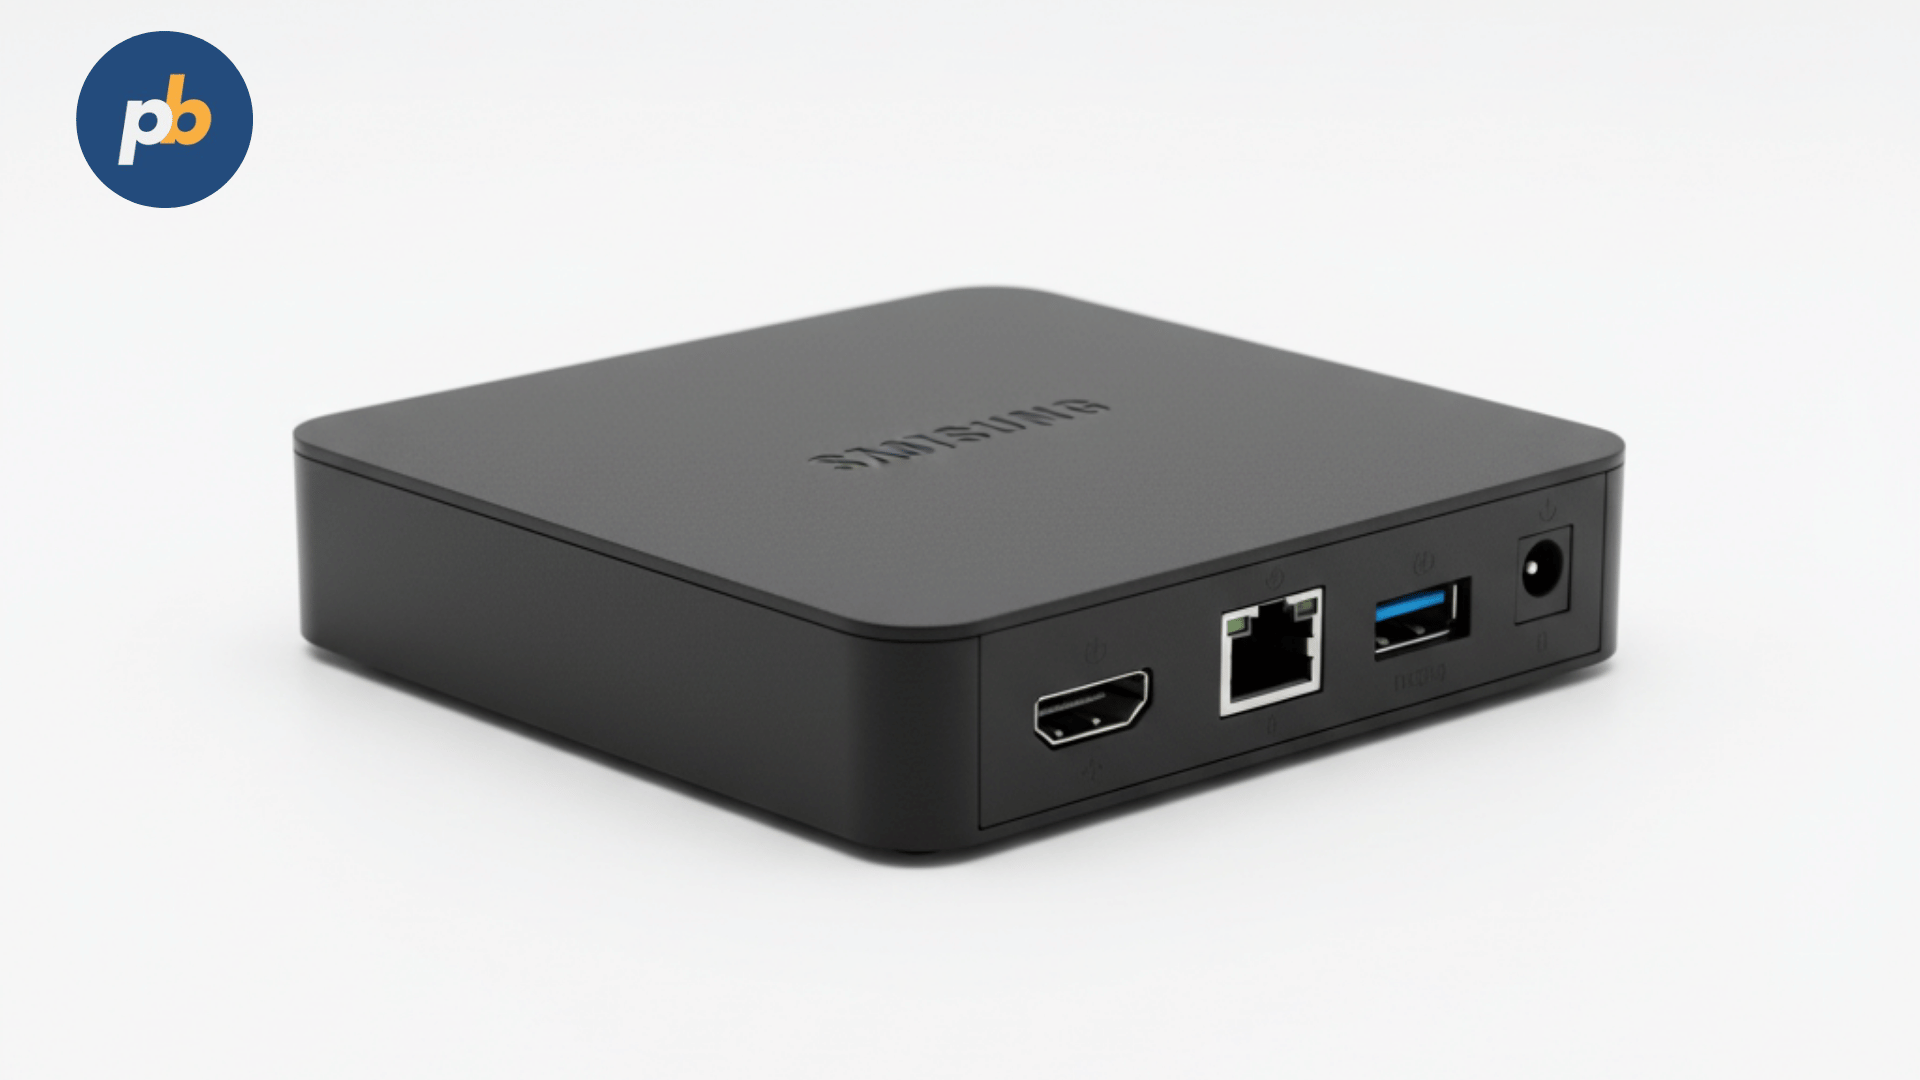
Digital signage players are small, powerful devices that transform any ordinary display into an automated information or advertising screen. They connect to screens via HDMI and run digital signage software that streams or caches content from a CMS (Content Management System).
To use and set up digital signage players, connect them to a screen, install signage software, pair the device with your CMS, and schedule your content remotely for automatic playback.
These players serve as the middle link between your CMS and your display. They download media, store it locally, and play it according to your set schedule. For example, when a café installs PosterBooking on an Amazon Fire TV Stick and pairs it with its online account, it can instantly show breakfast, lunch, and promotional menus throughout the day - all automated.
Table Of Contents
- How to Setup Digital Signage Players
- What Are the Requirements to Setup Digital Signage Players?
- Step One - Unbox and Connect the Player to the Display
- Step Two - Power On and Connect to Wi-Fi
- Step Three - Install the Signage App or Access Web Player
- Step Four - Pair with the CMS Using Display Code or URL
- Step Five - Upload and Schedule Your Content
- Step Six - Enable Auto-Start and Verify Screen Playback
- How to Setup Digital Signage Players for Different Scenarios
- How to Setup Digital Signage Using Amazon Signage Stick
- How to Setup Digital Signage Using Amazon Fire TV Stick
- How to Setup Digital Signage Using Google Chromecast
- How to Setup Digital Signage Using Roku Devices
- How to Setup Digital Signage Using Korbyt Media Players
- How to Setup Digital Signage Using BrightSign Players
- How to Setup Digital Signage for Offline Operation
- How to Setup Digital Signage Players for 24/7 Continuous Playback
- Best Practices to Setup Digital Signage Players
- Mistakes to Avoid When Setting Up Digital Signage Players
- Using Digital Signage Players
- How to Use Digital Signage Players for Displaying Video Ads and Promotions
- How to Use Digital Signage Players for Menu Boards
- How to Use Digital Signage Players for Live Dashboards and Data Displays
- How to Use Digital Signage Players for Event and Schedule Boards
- How to Use Digital Signage Players for Interactive or Kiosk Displays
- How to Use Digital Signage Players for Multi-Screen Video Walls
- Best Practices on Using Digital Signage Players
- Mistakes to Avoid When Using Digital Signage Players
- Troubleshooting Tips for Digital Signage Players
- FAQ on Setting Up and Using Digital Signage Players
- Final Takeaway
How to Setup Digital Signage Players
To set up a digital signage player, prepare the hardware, connect it to your display and Wi-Fi, install your signage software, pair it with your CMS, and verify playback. PosterBooking, which offers 10 free screens, is one of the simplest platforms to start with.
What Are the Requirements to Setup Digital Signage Players?
The following items are required to set up and operate a digital signage player properly:
- Compatible media player device such as Amazon Signage Stick, Fire TV Stick, Chromecast, Roku, Korbyt, or BrightSign
- Display screen with HDMI port to receive the player’s video output
- Wi-Fi or Ethernet connection to sync and download content
- Digital signage app or CMS account (PosterBooking, Yodeck, OptiSigns, etc.)
- Power adapter or USB power for continuous operation
- Remote control or setup interface for navigation
- Optional USB drive or mounting bracket for offline operation or secure mounting
Having these ready ensures that installation goes smoothly without interruptions.
Step One - Unbox and Connect the Player to the Display
To begin setup, unbox the player and inspect all parts. Insert the HDMI connector into your screen’s HDMI port. Ensure the connection is secure and cables are not strained. For wall-mounted or outdoor displays, use a right-angle HDMI adapter or a mounting bracket for better stability and ventilation.
Step Two - Power On and Connect to Wi-Fi
Plug the player into its power adapter or USB port, turn on the display, and select the correct HDMI input. When the startup menu appears, open the network settings and connect to Wi-Fi or Ethernet. A stable connection is essential for consistent content updates and remote control.
Step Three - Install the Signage App or Access Web Player
Access the player’s app store and install your signage software. For example, PosterBooking’s app can be downloaded directly from the Amazon Appstore or accessed through a browser-based player. Once installed, the screen will display a pairing code.
Step Four - Pair with the CMS Using Display Code or URL
Log in to your CMS account on a computer or phone, go to “Add Display,” and enter the pairing code shown on the screen. The display will then connect to your CMS, ready to receive playlists or scheduled content.
PosterBooking allows naming each screen (for example, “Lobby Screen” or “Café Menu Board”), making management simple and organized.
Step Five - Upload and Schedule Your Content
Upload your videos, images, or announcements into your CMS library. Organize content into playlists and set schedules. For instance, a gym can show class times in the morning and promotions in the evening.
PosterBooking makes this step beginner-friendly with a drag-and-drop timeline tool for setting playback times without coding knowledge.
Step Six - Enable Auto-Start and Verify Screen Playback
Finally, turn on the player’s “auto-start” feature in its settings. This ensures that playback resumes automatically after reboots or power outages. Test the screen to confirm that videos play smoothly and that content caches correctly for offline viewing.
How to Setup Digital Signage Players for Different Scenarios
To set up digital signage players for different scenarios, follow the instructions specific to your device type. Each player has a unique setup path optimized for its operating system and intended usage.
How to Setup Digital Signage Using Amazon Signage Stick
To set up digital signage using the Amazon Signage Stick, connect it to your display’s HDMI port, link it to Wi-Fi, install the PosterBooking app from the Amazon Appstore, and pair it using the display code. Once paired, assign content through your PosterBooking dashboard.
Step-by-step setup for Amazon Signage Stick:
- Step One: Plug the Amazon Signage Stick into the HDMI port of your display.
- Step Two: Power the device using the included adapter or USB port.
- Step Three: Turn on your display and connect the stick to Wi-Fi.
- Step Four: Open the Amazon Appstore and install the PosterBooking app.
- Step Five: Launch the app, note the pairing code, and enter it into your PosterBooking CMS account.
- Step Six: Assign playlists or schedules to the paired display and verify playback.
This plug-and-play system is ideal for quick installations, particularly for retail shops, cafés, and small offices.
How to Setup Digital Signage Using Amazon Fire TV Stick
To set up digital signage using the Amazon Fire TV Stick, plug the device into your HDMI port, connect to Wi-Fi, and install a digital signage app such as PosterBooking or OptiSigns from the Appstore. You can also sideload apps via APK files for advanced settings like kiosk mode.
Step-by-step setup for Amazon Fire TV Stick:
- Step One: Plug the Fire TV Stick into your HDMI port and connect the power adapter.
- Step Two: Turn on your display and complete the basic setup (language, Wi-Fi, and updates).
- Step Three: Open the Amazon Appstore and install PosterBooking or another signage app.
- Step Four: Launch the app, copy the pairing code, and link it to your CMS dashboard.
- Step Five: Upload media and create a playlist within your CMS.
- Step Six: Enable “auto-start” in the app settings and confirm content playback.
The Fire TV Stick setup is best for small businesses that need a simple, flexible signage solution without enterprise infrastructure.
How to Setup Digital Signage Using Google Chromecast
To set up digital signage using Google Chromecast, connect it to your display, open your CMS dashboard in Chrome, and cast the web player to the Chromecast-connected screen.
Step-by-step setup for Google Chromecast:
- Step One: Plug the Chromecast into your HDMI port and power it on.
- Step Two: Connect Chromecast to Wi-Fi using the Google Home app.
- Step Three: On your computer, open your CMS (e.g., PosterBooking) in Chrome.
- Step Four: Select “Cast” and choose your Chromecast device.
- Step Five: Load your CMS web player and start displaying content.
- Step Six: Keep Chrome open for continuous playback, as Chromecast does not store content offline.
This is the simplest and most affordable option for temporary events or pop-up installations but requires a stable Wi-Fi connection.
How to Setup Digital Signage Using Roku Devices
To set up digital signage using Roku, connect the device to your display, install a compatible signage app like Look or Rise Vision from the Roku Channel Store, and pair it with your CMS account.
Step-by-step setup for Roku devices:
- Step One: Plug the Roku device into your HDMI port and power it on.
- Step Two: Connect to Wi-Fi through the Roku setup menu.
- Step Three: Open the Roku Channel Store and install your signage app.
- Step Four: Launch the app and enter the pairing code on your CMS dashboard.
- Step Five: Assign playlists or schedules to the paired Roku screen.
- Step Six: Test the playback for smooth looping and screen alignment.
Roku signage is best suited for small retail stores or fitness centers that already use Roku for entertainment screens.
How to Setup Digital Signage Using Korbyt Media Players
To set up digital signage using Korbyt players, connect the player to your HDMI display, configure the network, register the device in your Korbyt Anywhere account, and assign content remotely.
Step-by-step setup for Korbyt Media Players:
- Step One: Connect the Korbyt player to your display via HDMI.
- Step Two: Power on the device and access the network configuration menu.
- Step Three: Log in to your Korbyt Anywhere account from a browser.
- Step Four: Register the device by entering the displayed pairing code.
- Step Five: Assign playlists and layouts from the CMS dashboard.
- Step Six: Test real-time analytics and confirm playback consistency.
Korbyt’s enterprise system supports multiple displays and real-time updates, making it ideal for corporations and universities.
How to Setup Digital Signage Using BrightSign Players
To set up digital signage using BrightSign players sush as the BrightSign LS5, connect the player to your display, insert a configured SD card or log in to the BrightAuthor software, pair the player, and assign content.
Step-by-step setup for BrightSign players:
- Step One: Connect the BrightSign player to your display using HDMI.
- Step Two: Plug in power and Ethernet cables for reliable performance.
- Step Three: Insert the SD card with BrightAuthor setup files or use BrightAuthor:connected software.
- Step Four: Register the player and link it to your BrightSign Cloud account.
- Step Five: Upload your content and schedule playback through BrightAuthor.
- Step Six: Confirm 4K playback quality and test offline caching.
BrightSign is the professional’s choice for airports, hotels, and control rooms due to its stable offline playback and high-end features.
How to Setup Digital Signage for Offline Operation
To set up digital signage for offline operation, preload all required content to the player’s internal storage or USB drive and enable caching features in your signage app.
Step-by-step setup for offline operation:
- Step One: Upload your content to your CMS and push it to the player while connected to the internet.
- Step Two: Verify that caching or offline playback mode is enabled.
- Step Three: Disconnect the device from the internet once content is downloaded.
- Step Four: Test the display to ensure content plays seamlessly offline.
- Step Five: Reconnect to Wi-Fi periodically for updates or new uploads.
Offline setup is perfect for rural areas, exhibitions, or industrial sites with unstable connectivity.
How to Setup Digital Signage Players for 24/7 Continuous Playback
To set up digital signage players for 24/7 continuous playback, use players that support power scheduling, auto-reboot, and cooling systems.
Step-by-step setup for continuous playback:
- Step One: Choose hardware designed for constant operation, like BrightSign or Korbyt.
- Step Two: Enable automatic reboot timers to prevent long uptime freezes.
- Step Three: Set content schedules to loop continuously with minimal idle time.
- Step Four: Keep players in ventilated areas or use cooling fans to prevent overheating.
- Step Five: Monitor performance through your CMS analytics dashboard.
Continuous playback ensures uninterrupted messaging for critical displays such as airports, control centers, and retail showrooms.
Best Practices to Setup Digital Signage Players
To achieve reliable performance and maximum lifespan, follow structured best practices when setting up digital signage players. These ensure stable connectivity, high playback quality, and efficient screen management.
Key best practices for setting up digital signage players include:
- Use wired Ethernet whenever possible. A wired connection ensures steady data transfer and prevents Wi-Fi dropouts that can interrupt playback.
- Enable device auto-restart after power loss. This keeps screens running automatically after outages without needing manual resets.
- Group screens logically within your CMS. Organize displays by location or purpose (for example, “Lobby Displays” or “Menu Boards”) for faster control and analytics.
- Keep firmware and CMS software updated. Updates improve stability, add new formats, and patch vulnerabilities.
- Allow sufficient airflow around the device. Overheating reduces performance and may cause random reboots.
PosterBooking’s platform supports automatic player restarts, content grouping, and live monitoring - making it easier for users to maintain smooth, professional operation without complex setup.
Mistakes to Avoid When Setting Up Digital Signage Players
To prevent future maintenance problems or poor performance, avoid the following setup errors:
Common setup mistakes to avoid:
- Mixing consumer-grade and enterprise devices on one network. This leads to inconsistent playback and compatibility issues.
- Neglecting regular firmware updates. Outdated software often causes lag, crashes, and CMS sync errors.
- Blocking airflow by mounting behind enclosed panels. Lack of ventilation can overheat players, especially in 24/7 environments.
- Skipping initial playback testing. Always run content for at least 15–30 minutes to ensure stable performance.
According to Display Technology Review (2023), installations that perform full testing before deployment experience 61% fewer playback issues in their first six months of operation.
Using Digital Signage Players
To use digital signage players effectively, assign your screens to display relevant content - from advertisements and menu boards to live dashboards and interactive kiosks. Once configured, your CMS automatically manages the playback schedule and content rotation.
Digital signage players support a wide variety of display types, enabling small shops, offices, airports, and even hospitals to show targeted information seamlessly.
How to Use Digital Signage Players for Displaying Video Ads and Promotions
To use digital signage players for displaying video ads, upload your promotional clips or slides to your CMS, assign them to specific screens, and set playback intervals or time-of-day schedules.
Example workflow:
- Upload ad videos or image slides into PosterBooking.
- Create a playlist (e.g., “Weekly Promotions”).
- Schedule morning, afternoon, or evening slots for different offers.
- Assign the playlist to your store or lobby screens.
This setup helps retail shops and restaurants showcase offers dynamically without manual changes. Consistent video advertising across locations can boost in-store sales by up to 18%, according to Retail Display Insights (2024).
How to Use Digital Signage Players for Menu Boards
To use digital signage players for menu boards, connect the player to your restaurant’s display, pair it with your CMS, and upload your menu templates or pricing visuals.
Step-by-step guide for digital menu boards:
- Step One: Pair your player with PosterBooking or another CMS.
- Step Two: Upload your menu background and item images.
- Step Three: Enter item names, prices, and update fields dynamically from your CMS.
- Step Four: Create playlists that separate breakfast, lunch, and dinner menus.
- Step Five: Schedule each playlist by time of day.
PosterBooking allows real-time updates, so when a price changes or an item sells out, you can modify it instantly from your dashboard without visiting the screen physically.
How to Use Digital Signage Players for Live Dashboards and Data Displays
To use digital signage players for live dashboards, integrate your CMS with data sources such as APIs or Google Sheets. Then design a layout displaying KPIs, performance metrics, or live statistics.
Step-by-step setup for live dashboards:
- Step One: Connect your signage player to the network and pair it with your CMS.
- Step Two: Create a new layout or template with data widgets (charts, counters, or tables).
- Step Three: Link each widget to your live data source or API feed.
- Step Four: Assign the layout to a screen and refresh intervals to update data automatically.
Live dashboards are common in corporate offices, logistics centers, and IT operations rooms, giving teams instant visibility into real-time performance.
How to Use Digital Signage Players for Event and Schedule Boards
To use digital signage players for event boards, connect your player, link your CMS to a scheduling source (like Google Calendar or a booking system), and design a display layout that shows upcoming events or room reservations.
Typical setup flow:
- Connect and pair the player.
- Import calendar feeds from your scheduling app.
- Assign a layout that displays event names, times, and rooms.
- Schedule updates every few minutes.
Hotels, universities, and conference centers rely on such boards for clear navigation and attendee communication.
How to Use Digital Signage Players for Interactive or Kiosk Displays
To use digital signage players for interactive displays, connect your player to a touchscreen-capable display and enable touch input settings in your CMS.
Step-by-step setup for interactive screens:
- Step One: Connect the signage player to a touchscreen display (BrightSign or Korbyt support this natively).
- Step Two: Enable “touch” or “interactive mode” in the player’s settings.
- Step Three: Upload HTML5 or interactive content files to your CMS.
- Step Four: Assign and preview the content on-screen.
Interactive digital signage is commonly used for directories, museum kiosks, and self-check-in terminals.
How to Use Digital Signage Players for Multi-Screen Video Walls
To use digital signage players for video walls, combine multiple synchronized players and assign each to a specific screen segment using your CMS.
Step-by-step setup for video walls:
- Step One: Connect each player to one display panel via HDMI.
- Step Two: Configure synchronization settings in your CMS (e.g., “Screen 1 Left,” “Screen 2 Right”).
- Step Three: Upload high-resolution split-screen video content.
- Step Four: Assign each video segment to its corresponding screen.
- Step Five: Test synchronization and adjust timing until frames align perfectly.
BrightSign offers exceptional multi-screen synchronization with frame-accurate playback, making it a popular choice for exhibitions and control rooms.
Best Practices on Using Digital Signage Players
To maximize content quality and system reliability, follow these proven operational best practices:
- Use separate playlists for day and night schedules. This ensures lighting and content match the environment’s context.
- Monitor device uptime through CMS analytics. Early detection of screen downtime prevents service interruptions.
- Cache critical content locally. Keep important visuals playable even without internet access.
- Rotate promotional themes periodically. Updated content keeps audiences engaged and avoids visual fatigue.
- Regularly test new formats. Some players may need codec updates to support the latest video types.
PosterBooking users benefit from automated content caching and real-time uptime reports, allowing non-technical users to maintain professional displays easily.
Mistakes to Avoid When Using Digital Signage Players
Avoiding operational mistakes can save time and protect the hardware from unnecessary wear:
- Using streaming-only setups without caching. This leads to playback failures when the network disconnects.
- Ignoring device cooling requirements. Players left in hot enclosures overheat, causing lag or shutdowns.
- Skipping firmware updates. Outdated software can disrupt CMS pairing or reduce playback smoothness.
- Overloading playlists with oversized files. Compress media to recommended bitrates (under 20 Mbps for 4K).
Following these practices ensures screens stay responsive and operational over years of use.
Troubleshooting Tips for Digital Signage Players
To fix common digital signage player issues when during setup, identify whether the problem originates from the device, the network, or the CMS. The most frequent issues include connection errors, app crashes, pairing failures, and playback lags.
Common troubleshooting steps by issue type:
- Connection errors: Restart the player, verify Wi-Fi credentials, or switch to Ethernet for testing.
- App crashes: Clear cache or reinstall the signage app; ensure the latest firmware is installed.
- CMS pairing failures: Check that the device clock is accurate - mismatched timezones often cause pairing errors.
- Playback lags: Reduce video resolution, shorten playlists, or verify that local caching is enabled.
- Blank screens: Confirm HDMI source input is correct and reboot the player.
If using PosterBooking, its dashboard displays player status indicators (online/offline), making it simple to identify which screens need attention remotely.
You can read our full guide on8 common digital signage setup problems, you are likely to face during setting up digital signage.
FAQ on Setting Up and Using Digital Signage Players
Q1: Can digital signage players run offline? Yes. Players like BrightSign and Korbyt can cache full playlists for uninterrupted playback. In PosterBooking, you can also enable local caching to show content even when the internet disconnects.
Q2: What’s the best player for beginners? Amazon Fire TV Stick or Amazon Signage Stick are the best entry options because they’re inexpensive, widely available, and compatible with free software like PosterBooking.
Q3: How many screens can I control with free software? PosterBooking allows up to 10 free screens, letting small businesses deploy signage without licensing costs.
Q4: How often should I update my content? Update visual content at least once a week to maintain viewer engagement. Seasonal or promotional screens may require daily updates.
Q5: Why is my content not updating on-screen? Check your CMS for scheduling conflicts or expired playlists. Ensure the player is online and synced with the CMS’s latest data.
Q6: Do digital signage players work with vertical screens? Yes. Most CMS platforms allow portrait or landscape orientation in their display settings. Adjust your screen rotation before scheduling playlists.
Q7: Which CMS is best for multi-location management? PosterBooking, Korbyt, and BrightSign Cloud are popular choices. PosterBooking stands out for offering simple control, automatic updates, and a free tier that supports multiple locations.
Final Takeaway
Setting up and using digital signage players becomes simple when broken into clear steps: connect, configure, pair, and play. Whether deploying one screen or managing hundreds, following structured setup practices and using a reliable CMS like PosterBooking ensures your displays run smoothly, stay updated, and deliver professional-grade results with minimal maintenance.
According to Display Futures (2024), organizations that adopt centralized CMS management report 45% higher content uptime and fewer support tickets - proving that digital signage efficiency begins with proper player setup.