Table Of Contents
- How to Setup Digital Signage Displays
- What Are the Requirements to Setup a Digital Signage Display
- Step One, Choose the Right Display Type for Your Environment
- Step Two, Mount the Display Securely
- Step Three, Connect Power and Media Source
- Step Four, Configure Display Settings
- Step Five, Connect to Wi-Fi or Ethernet
- Step Six, Schedule and Test Display Content
- How to Setup Digital Signage Displays for Different Scenarios
- How to Setup LED Digital Signage Displays
- How to Setup LCD Digital Signage Displays
- How to Setup OLED Digital Signage Displays
- How to Setup QLED Digital Signage Displays
- How to Setup Transparent Digital Signage Displays
- How to Setup Curved or Ultra-Wide Digital Signage Displays
- How to Setup Outdoor Weatherproof Digital Signage Displays
- How to Setup Wall Video Matrix Digital Signage Displays
- How to Setup Energy-Efficient Digital Signage Displays
- Best Practices to Setup Digital Signage Displays
- Mistakes to Avoid When Setting Up Digital Signage Displays
- How to Use Digital Signage Displays
- How to Use Digital Signage Displays for Advertising and Promotions
- How to Use Digital Signage Displays for Wayfinding and Directions
- How to Use Digital Signage Displays for Information and Alerts
- How to Use Digital Signage Displays for Menus and Pricing Boards
- How to Use Digital Signage Displays for Events and Exhibitions
- How to Use Digital Signage Displays for Branding and Customer Engagement
- Best Practices on Using Digital Signage Displays
- Mistakes to Avoid When Using Digital Signage Displays
- Troubleshooting Tips for Digital Signage Displays
- Frequently Asked Questions
- Final Takeaway
Visual displays for digital signage serve as the core element of any modern communication network, turning static areas into interactive environments through the broadcast of ads, info, and live updates.
Utilizing a digital signage screen involves mounting the hardware firmly, linking it to a media source, adjusting the visual settings, and controlling your material via a CMS or local playback.
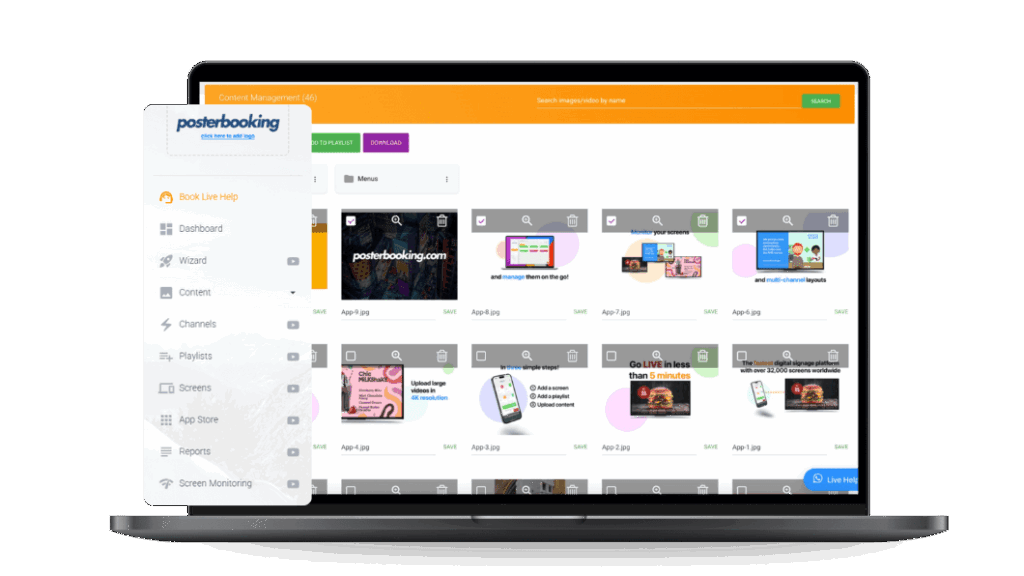
Digital signage displays such as LED, LCD, OLED, and QLED panels link directly to players that run CMS software like PosterBooking. The CMS sends scheduled images, videos, or live feeds that the screen renders continuously. Using a signage display therefore combines three core functions, visual hardware, network control, and content automation.
When configured correctly, a display adjusts brightness automatically, receives updates remotely, and shows targeted messages around the clock. PosterBooking, which offers 10 free screens, provides an ideal entry point for beginners learning signage control.
How to Setup Digital Signage Displays
Setting up a signage monitor requires selecting the right hardware for the location, readying the mount and power supply, connecting your media player, and syncing with your management software. Proper setup ensures long-term stability, vivid visuals, and safe operation.
What Are the Requirements to Setup a Digital Signage Display
Prior to starting the install, ensure that you have all necessary equipment on hand:
- Display Screen: LED, LCD, OLED, or QLED panel rated for commercial use
- Media Player or System-on-Chip (SoC): Dedicated signage player or built-in processor
- Mounting Brackets or Stands: Wall, ceiling, or floor mounts supporting screen weight
- HDMI / DisplayPort Cable or Wireless Casting Device: For signal connection
- Power Supply with Surge Protection: Ensures stable electricity and safety compliance
- Internet Connection: Wi-Fi or Ethernet for CMS control and content syncing
- Content Management System (CMS): Optional but essential for remote scheduling (PosterBooking recommended)
Having these ready streamlines installation and minimizes future maintenance.
Step One, Choose the Right Display Type for Your Environment
For a proper setup, begin by choosing a monitor that is suited for the specific lighting and environment of its location.
Step-by-step process to set up the right display type:
- Step One: Assess ambient lighting, indoor, semi-outdoor, or outdoor.
- Step Two: Choose brightness levels accordingly: 350 nits (indoor), 700, 2500 nits (semi-outdoor), >3000 nits (outdoor).
- Step Three: Decide panel technology, LED for large scale, LCD for cost-effective interiors, OLED for premium visuals.
- Step Four: Confirm resolution needs (Full HD, 4K, or 8K) based on screen size and viewing distance.
- Step Five: Verify energy efficiency and warranty terms for 24/7 usage.
Choosing properly avoids visibility issues and excessive power consumption.
Step Two, Mount the Display Securely
Mounting the screen with appropriate VESA-rated hardware is essential for both safety and achieving the best viewing angles.
Step-by-step process to mount a digital signage display:
- Step One: Select a mounting kit rated for your screen’s weight and size.
- Step Two: Mark wall studs or secure anchor points for stability.
- Step Three: Leave 5, 10 cm clearance for ventilation.
- Step Four: Tilt or angle the display toward audience eye-level (usually ≈1.5 m from floor).
- Step Five: Tighten all bolts and test for vibration or wobble.
Proper mounting protects the investment and improves viewer comfort.
Step Three, Connect Power and Media Source
Get your monitor running by connecting the power cable and your chosen media input source.
Step-by-step process to connect power and media source:
- Step One: Plug the display into a surge-protected outlet or power conditioner.
- Step Two: Connect the HDMI or DisplayPort cable from your media player or signage stick.
- Step Three: If using an SoC display, insert a USB drive or connect the network cable directly.
- Step Four: Power on both devices and confirm that the display recognizes the input source.
- Step Five: Label the cables for easier maintenance later.
This stage links hardware communication between the player and screen.
Step Four, Configure Display Settings
Fine-tuning the resolution, color, and brightness is key to ensuring the highest visual fidelity for your content.
Step-by-step process to configure display settings:
- Step One: Set the correct input source (HDMI 1, DisplayPort 1, etc.).
- Step Two: Adjust resolution to match the content output (e.g., 1080p or 4K).
- Step Three: Tune brightness and contrast according to ambient light.
- Step Four: Select color temperature (6500 K for natural white).
- Step Five: Choose orientation (landscape or portrait) as per layout design.
Commercial displays often include “signage mode,” which locks settings to prevent accidental tampering, enable this before deployment.
Step Five, Connect to Wi-Fi or Ethernet
Connecting your hardware to the web is necessary for remote management and keeping content updated.
Step-by-step process to connect digital signage to network:
- Step One: Open the network or Wi-Fi menu on the player or display.
- Step Two: Choose a dedicated SSID reserved for signage traffic if possible.
- Step Three: Enter credentials and test connection speed.
- Step Four: For wired setups, connect an Ethernet cable to reduce interference.
- Step Five: Confirm the CMS (e.g., PosterBooking) recognizes the device online.
Stable connectivity guarantees smooth scheduling and analytics reporting.
Step Six, Schedule and Test Display Content
Once the hardware is in place, check that the content is being delivered correctly and looks professional.
Step-by-step process to schedule and test digital signage content:
- Step One: Upload sample media into your CMS.
- Step Two: Assign it to the paired display and set playback times.
- Step Three: Observe motion smoothness and color uniformity.
- Step Four: Adjust brightness to avoid glare or eye strain.
- Step Five: Let content loop for several hours to confirm stability.
PosterBooking allows drag-and-drop scheduling, enabling quick playlist tests even for non-technical users.
How to Setup Digital Signage Displays for Different Scenarios
Adapting your installation to specific environmental needs and hardware types is vital for various signage scenarios. Each display type serves a unique purpose and requires specific calibration.
How to Setup LED Digital Signage Displays
Setting up LED panels involves assembling modular units, linking data and power, and adjusting brightness for outdoor use.
Step-by-step process to set up LED digital signage displays:
- Step One: Arrange LED panels according to design layout (e.g., 4 × 4 matrix).
- Step Two: Connect data cables between modules and link them to the controller.
- Step Three: Power up using a regulated power supply.
- Step Four: Adjust pixel pitch and brightness (≥3500 nits for outdoors).
- Step Five: Seal joints and test for waterproofing (IP65 minimum).
LED displays are best for stadiums, outdoor billboards, and building façades due to their durability and high luminance.
How to Setup LCD Digital Signage Displays
Installing LCD signage screens requires indoor mounting, connecting the media player, and adjusting backlighting for uniform color.
Step-by-step process to set up LCD digital signage displays:
- Step One: Mount the LCD panel using a wall bracket with rear airflow space.
- Step Two: Connect HDMI or DisplayPort to the player or SoC.
- Step Three: Power on and calibrate brightness (300, 700 nits for indoor).
- Step Four: Adjust contrast ratio to ≥ 1000:1 for crisp visuals.
- Step Five: Enable signage mode to prevent automatic sleep or pop-ups.
LCDs are economical for offices, retail stores, and healthcare facilities.
How to Setup OLED Digital Signage Displays
When installing OLED displays, the priority should be maintaining image detail and avoiding screen burn-in.
Step-by-step process to set up OLED digital signage displays:
- Step One: Mount the ultra-thin screen carefully using manufacturer-approved mounts.
- Step Two: Connect the HDMI or media input and enable pixel-shift protection in settings.
- Step Three: Limit brightness to 60, 70 % for prolonged use.
- Step Four: Use dark or animated backgrounds to prevent static burn-in.
- Step Five: Schedule rest intervals or screen savers overnight.
OLED panels deliver superior color accuracy, making them ideal for luxury retail or galleries.
How to Setup QLED Digital Signage Displays
Configuring QLED monitors involves focusing on power efficiency and brightness management.
Step-by-step process to set up QLED digital signage displays:
- Step One: Mount the display in high-ambient-light areas such as storefronts.
- Step Two: Connect to the media player via HDMI 2.0 for HDR output.
- Step Three: Enable HDR10 or HDR+ modes in settings.
- Step Four: Activate eco-mode to manage power consumption.
- Step Five: Calibrate color gamut to DCI-P3 standards.
QLED displays are suited for bright indoor or semi-outdoor venues requiring vivid colors and wide visibility.
How to Setup Transparent Digital Signage Displays
Properly setting up transparent screens requires balancing the foreground content with the light behind the panel.
Step-by-step process to set up transparent digital signage displays:
- Step One: Mount the transparent panel on glass or acrylic surfaces facing the audience.
- Step Two: Adjust ambient lighting behind the panel to maintain contrast.
- Step Three: Connect the integrated controller via HDMI or USB.
- Step Four: Upload high-contrast visuals (white on dark background).
- Step Five: Test readability from various angles.
These displays are popular in luxury stores for showcasing products behind dynamic visuals.
How to Setup Curved or Ultra-Wide Digital Signage Displays
Managing the aspect ratio and physical curve is critical when setting up ultra-wide signage screens.
Step-by-step process to set up curved or ultra-wide digital signage displays:
- Step One: Use mounts designed for the specific curvature radius.
- Step Two: Connect multiple panels using daisy-chain HDMI or DisplayPort.
- Step Three: Configure aspect ratio (32:9 or 21:9 common).
- Step Four: Calibrate bezel compensation to eliminate visible gaps.
- Step Five: Verify uniform brightness across the curve.
Curved signage immerses viewers in airports, exhibitions, and museums.
How to Setup Outdoor Weatherproof Digital Signage Displays
Ensuring complete protection from the elements is the main goal when installing outdoor signage.
Step-by-step process to set up outdoor weatherproof digital signage displays:
- Step One: Install the display inside an IP-rated enclosure (IP65 minimum).
- Step Two: Use UV-resistant glass and anti-glare coating for sunlight readability.
- Step Three: Provide temperature control via fans or heaters for −20 °C to 50 °C ranges.
- Step Four: Connect to surge-protected outdoor power lines.
- Step Five: Test waterproof seals and brightness (≥ 4000 nits).
These setups are ideal for transit hubs and outdoor advertising networks.
How to Setup Wall Video Matrix Digital Signage Displays
Creating a video wall involves syncing several monitors to act as a single, expansive display surface.
Step-by-step process to set up wall video matrix digital signage displays:
- Step One: Arrange displays in the desired configuration (e.g., 3 × 3 grid).
- Step Two: Connect all screens to a matrix controller or daisy-chain inputs.
- Step Three: Calibrate color and brightness uniformity across all panels.
- Step Four: Enable synchronization mode in your CMS (PosterBooking supports grouped playback).
- Step Five: Test full-screen videos for seamless transitions.
Video walls create dramatic impact in command centers and event venues.
How to Setup Energy-Efficient Digital Signage Displays
Using light sensors and power-saving modes is the best way to set up eco-friendly signage.
Step-by-step process to set up energy-efficient digital signage displays:
- Step One: Activate auto-brightness sensors to adapt to ambient light.
- Step Two: Schedule power-off cycles during off-hours through CMS.
- Step Three: Use low-consumption LED backlights and eco-modes.
- Step Four: Monitor energy analytics in CMS dashboards.
- Step Five: Clean ventilation paths regularly to maintain cooling efficiency.
Energy-aware configurations can reduce power bills by up to 35 %, according to Energy Display Lab (2026).
Best Practices to Setup Digital Signage Displays
Adhering to these core principles will help you get the best performance and longevity from your screens:
- Use displays rated explicitly for 24/7 operation.
- Calibrate brightness to ambient light levels daily.
- Regularly clean vents and fans to prevent overheating.
- Secure cables with management clips to avoid accidental disconnections.
- Back up CMS content to cloud storage for quick recovery.
PosterBooking’s CMS allows automatic brightness scheduling and remote monitoring, making compliance with these best practices easy.
Mistakes to Avoid When Setting Up Digital Signage Displays
Stay away from these common installation errors that can negatively impact your display's performance:
- Mixing indoor and outdoor-rated panels, which leads to poor visibility or damage.
- Ignoring pixel pitch versus viewing distance, resulting in blurry images up close.
- Leaving static images too long on OLED screens, causing permanent burn-in.
- Using consumer TVs instead of commercial-grade panels for 24/7 operation.
Avoiding these errors keeps displays reliable, professional, and visually consistent.
How to Use Digital Signage Displays
For effective use of digital signage, link your screens to a player, import media into a CMS, and schedule content that captures audience attention. Displays can deliver advertising, menus, real-time data, or wayfinding maps across virtually any environment.
Once displays are configured and networked, your CMS (for example, PosterBooking) handles scheduling, playback, and remote monitoring automatically. According to Display Analytics Review (2026), businesses using automated scheduling improve content freshness by 42 % compared with manual updates.
How to Use Digital Signage Displays for Advertising and Promotions
To use digital signage displays for advertising and promotions, upload product videos, banners, or brand visuals to your CMS and assign them to designated retail or mall screens.
Step-by-step process to use digital signage for advertising:
- Step One: Prepare short promotional videos (10, 30 seconds) optimized for 1080p or 4K.
- Step Two: Upload the assets to your CMS library (PosterBooking supports drag-and-drop uploads).
- Step Three: Create a playlist labeled “Promotions Loop.”
- Step Four: Schedule playback during high-traffic hours such as 9 a.m., 8 p.m.
- Step Five: Monitor impressions or dwell-time analytics from the CMS dashboard.
Dynamic retail advertising can increase impulse sales by 18, 25 %, according to Retail Media Journal (2026).
How to Use Digital Signage Displays for Wayfinding and Directions
To use digital signage displays for wayfinding, design maps and directional layouts that update automatically through your CMS.
Step-by-step process to use digital signage for wayfinding:
- Step One: Map your facility in vector format for crisp scaling.
- Step Two: Add directional arrows and zone labels in your CMS template.
- Step Three: Connect data feeds from booking or location systems if needed.
- Step Four: Schedule updates for events or room reassignments.
- Step Five: Test readability from 2, 3 meters and adjust contrast.
Hospitals, campuses, and shopping malls rely on wayfinding signage to minimize confusion and improve visitor flow.
How to Use Digital Signage Displays for Information and Alerts
To use digital signage displays for information and alerts, connect your CMS to live data sources or RSS feeds to display schedules, announcements, or safety messages.
Step-by-step process to use digital signage for information:
- Step One: Add an “information zone” layout in your CMS.
- Step Two: Integrate live feeds such as weather, transit, or emergency notifications.
- Step Three: Set high-contrast colors (white on dark or vice versa).
- Step Four: Schedule frequent refresh intervals (every 60 seconds).
- Step Five: Verify synchronization accuracy and test under low-network conditions.
Transportation hubs and campuses benefit most from such real-time signage.
How to Use Digital Signage Displays for Menus and Pricing Boards
To use digital signage displays for menus, upload menu layouts to your CMS and link pricing or item data from spreadsheets or APIs.
Step-by-step process to use digital signage for menus:
- Step One: Pair your player-equipped display with PosterBooking.
- Step Two: Upload menu templates and item images.
- Step Three: Import prices from Google Sheets or POS systems.
- Step Four: Schedule playlists by meal times.
- Step Five: Enable automatic price updates when data changes.
Restaurants using digital menu boards report a 19 % increase in order value, according to Quick-Service Display Study (2026).
How to Use Digital Signage Displays for Events and Exhibitions
To use digital signage displays for events, connect large LED or QLED screens to your event CMS or playback system to show agendas, sponsor visuals, and immersive backgrounds.
Step-by-step process to use digital signage for events:
- Step One: Import event timelines or session data into your CMS.
- Step Two: Assign each session to specific time slots.
- Step Three: Integrate sponsor slides between segments.
- Step Four: Set countdown or now-playing timers.
- Step Five: Test loop transitions before the event starts.
Event venues using synchronized signage reduce audience confusion and improve sponsor visibility significantly.
How to Use Digital Signage Displays for Branding and Customer Engagement
To use digital signage displays for branding, integrate motion sensors, QR codes, or interactive touch overlays that let audiences engage directly.
Step-by-step process to use digital signage for branding and engagement:
- Step One: Install touch or proximity sensors on your display frame.
- Step Two: Upload interactive HTML5 or QR-linked content to your CMS.
- Step Three: Configure actions (e.g., open product pages or discount codes).
- Step Four: Track engagement analytics through your CMS.
- Step Five: Rotate campaigns regularly to sustain novelty.
Interactive digital signage bridges online and physical experiences, helping brands collect valuable behavioral data.
Best Practices on Using Digital Signage Displays
To operate displays efficiently and maintain image quality, apply disciplined usage habits.
Best practices when using digital signage displays:
- Rotate content frequently to prevent image retention or burn-in.
- Optimize font size and contrast for readability from expected viewing distances.
- Schedule automatic dimming at night or in low-light zones to save energy.
- Keep content file sizes optimized to avoid buffering or playback lag.
- Back up media libraries on secure cloud servers.
PosterBooking’s scheduling tools make these best practices easy to implement across multiple locations.
Mistakes to Avoid When Using Digital Signage Displays
Common mistakes can shorten screen life or reduce audience impact.
Key mistakes to avoid:
- Ignoring brightness levels relative to ambient lighting, resulting in glare or poor visibility.
- Running consumer TVs for 24/7 signage, they lack commercial-grade cooling.
- Overloading visuals with too many animations or small text, reducing legibility.
- Leaving static logos on OLED/QLED panels too long, risking burn-in.
- Neglecting routine calibration, causing uneven color or dim zones.
Avoiding these ensures professional-grade presentation every hour of operation.
Troubleshooting Tips for Digital Signage Displays
To troubleshoot digital signage display issues, isolate whether the fault lies in the hardware, cabling, or content software.
Most common problems and recommended fixes:
| Issue | Likely Cause | Recommended Solution |
|---|---|---|
| Display not powering on | Faulty cable or surge protector | Check outlet voltage; test alternate cable; verify power LED |
| Screen flickering | Loose HDMI or refresh mismatch | Reseat cable; set refresh rate = 60 Hz |
| Brightness inconsistency | Disabled auto-brightness sensor | Enable light sensor or recalibrate manually |
| Color distortion | Incorrect color temperature | Reset to 6500 K; recalibrate CMS color profile |
| CMS sync issues | Lost network connection | Restart player; check router; confirm CMS online status |
| No sound (if applicable) | Muted audio or wrong output | Check HDMI CEC settings and display volume |
Frequently Asked Questions
Q1: What is the best type of display for outdoor signage?
High-brightness LED or QLED panels rated ≥ 3500 nits and IP-certified for weather protection deliver the best outdoor visibility.
Q2: Can I run digital signage without internet?
Yes. Load content onto a USB drive or enable caching via your CMS. PosterBooking supports offline playback, syncing updates automatically once reconnected.
Q3: How bright should my display be?
Indoor displays typically use 300, 700 nits, semi-outdoor 1000, 2500 nits, and outdoor > 3500 nits for sunlight readability.
Q4: Can I use a regular TV for signage?
Consumer TVs aren’t designed for continuous operation. Always choose commercial-grade panels rated for 24/7 use.
Q5: How often should I clean or maintain my display?
Wipe vents and bezels monthly, check mounts quarterly, and recalibrate brightness every six months.
Q6: Which software is easiest for beginners?
PosterBooking, it’s free for up to 10 screens, cloud-based, and requires no coding to schedule or monitor displays.
Q7: Why does my display show black borders or stretched images?
Aspect ratio mismatch. Adjust CMS output and display scaling to 16:9 or the native resolution.
Q8: How do I ensure consistent color across multiple displays?
Calibrate one reference display and clone its settings to all others; many CMS platforms support calibration profiles.
Final Takeaway
Setting up and using digital signage displays is a structured process: choose the correct screen, mount securely, connect and configure, then control it via reliable CMS software. Once operational, rotating relevant content and maintaining display health ensure long-term success.
PosterBooking simplifies this entire workflow, from pairing screens and uploading playlists to remote monitoring, while remaining free for the first 10 screens. Whether deploying a single lobby display or a nationwide signage network, proper setup and disciplined operation will deliver vivid visuals, consistent branding, and measurable engagement.