
Live traffic updates are valuable for locations where people are making time-sensitive decisions or planning their routes. From hotel lobbies and transportation hubs to office buildings, car dealerships, and event venues, showing real-time traffic conditions helps your audience stay informed and plan better.
In this guide, you will learn how to display live traffic updates using PosterBooking, a free and easy-to-use digital signage platform that works on any screen with a smart display or connected device like an Amazon Fire Stick or Raspberry Pi.
Table Of Contents
- Why Display Live Traffic Updates on Digital Signage?
- What You Need to Get Started
- Step 1: Set Up Your Screen with PosterBooking
- Step 2: Generate a Live Traffic Map URL
- Step 3: Add the Live Traffic URL to PosterBooking
- Step 4: Create a Playlist for the Live Traffic Feed
- Step 5: Assign the Playlist to a Screen
- Optional Step: Display Traffic and Other Info Side by Side
- Final Thoughts
Why Display Live Traffic Updates on Digital Signage?
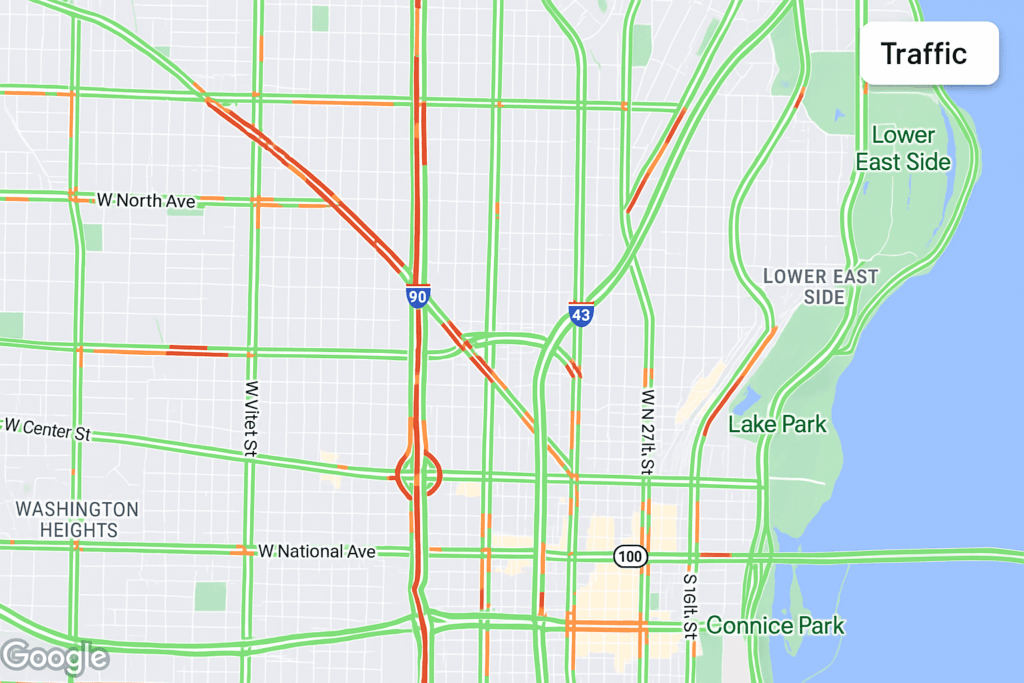
Displaying real-time traffic data enhances the utility of your signage, especially in areas where people are thinking about their commute or travel plans. Here are a few scenarios where live traffic maps make an impact:
- In hotels, guests can check traffic conditions before heading to business meetings or sightseeing spots
- In corporate buildings, employees can view updated road conditions before leaving the office
- In gas stations or car dealerships, it adds functional value and keeps visitors engaged
- At airports or train stations, it can complement departure boards and travel alerts
By integrating a live traffic feed into your screen, you make your signage more informative, actionable, and context aware.
Create an Account Today and Get 10 screens free for 3 months!
What You Need to Get Started
To display live traffic updates, you will need:
- A screen with an HDMI port (this could be a smart TV, monitor, or commercial display)
- A signage player such as:
- Amazon Fire Stick
- Raspberry Pi
- Android TV device
- An internet connection
- A PosterBooking account
- A shareable link to a live traffic map from a public source such as Google Maps with traffic layer enabled
Step 1: Set Up Your Screen with PosterBooking
If your screen is not already connected to PosterBooking, follow these steps:
- Install the PosterBooking app on your Fire Stick or Android TV device.
- Launch the app and take note of the code displayed on your screen.
- On your phone or computer, log into your PosterBooking dashboard at posterbooking.com.
- Go to the Screens section and click Add Screen.
- Enter the code from your screen and give it a name.
- Your screen will now be connected and ready to display content.
Step 2: Generate a Live Traffic Map URL
Next, you will need a public URL that displays live traffic. You can use Google Maps for this purpose:
- Open Google Maps in your browser
- Enable the traffic layer by clicking the Layers icon and selecting Traffic
- Center the map on your city or desired location
- Click Share and copy the public link
- Make sure the link is accessible without logging in
- You can also shorten the link for easier management
This URL will display real-time traffic conditions for the selected area.
Step 3: Add the Live Traffic URL to PosterBooking
Now that you have the link, go to your PosterBooking dashboard to upload it as a web content item.
- Navigate to the Content section
- Click on Websites
- Click Create URL
- Name your content something descriptive like “Live Traffic – Downtown LA”
- Paste the Google Maps link into the URL field
- Click Save
This traffic map is now saved in your content library and can be used in playlists.
Step 4: Create a Playlist for the Live Traffic Feed
To control how and when the traffic map displays, add it to a playlist.
- Go to the Playlists section
- Click Create Playlist and name it “Traffic Updates”
- Click Add Content and select the URL you just saved
- Click Save to finalize your playlist
You can also add other content like weather updates or news headlines to the same playlist to keep the screen dynamic and informative.
Don’t Miss Out! Get Access to PosterBooking Now!
Step 5: Assign the Playlist to a Screen
Now assign the playlist to the screen where you want to display the traffic updates.
- Go to the Screens section
- Find the screen you connected earlier
- Click Add or Edit Playlist
- Choose the “Traffic Updates” playlist
- Click Save
Your screen will now begin showing the live traffic map along with any additional content in the playlist.
Optional Step: Display Traffic and Other Info Side by Side
If you want to show traffic on one part of the screen and something else on the other, use PosterBooking’s Channels feature.
- Go to Channels in the dashboard
- Create a new channel and choose a layout like Split Vertically or Split Horizontally
- Assign one playlist with traffic updates and another with news or company announcements
- Assign the channel to your screen
This allows you to deliver more information within the same display space.
Final Thoughts
Live traffic updates are a practical and valuable addition to any digital signage setup. They keep your displays useful, timely, and relevant, especially for audiences who are planning their travel or managing logistics.
With PosterBooking, you can set all of this up at no cost, without needing advanced hardware or software. Its intuitive dashboard and support for website URLs make it simple to display real-time traffic from platforms like Google Maps.
You can get started for free by signing up at PosterBooking.com and turning your screens into an informative tool that adds real-time value to your business.