Table Of Contents
- Step 1: Choose Your Display
- Step 2: Add a Media Player if Needed
- Step 3: Set Up PosterBooking on Your Screen
- Step 4: Design Your Digital Menu
- Step 5: Upload Your Menu to PosterBooking
- Step 6: Create a Playlist
- Step 7: Assign the Playlist to Your Screen
- Step 8: Automate with Schedules for Breakfast, Lunch, and Dinner
- Step 9: Keep Your Menus Updated
- Why PosterBooking is Ideal for Restaurant Digital Menus in 2025
- Final Thoughts
In 2025, restaurants of every size are replacing printed menus with dynamic digital menu boards. Whether you run a fast casual restaurant, a coffee shop, a food truck, or a full-service dining space, digital menu boards help you deliver an updated, engaging experience for your customers. They are easier to maintain, easier to read, and more effective in promoting specials and upsells.
The good news is that setting up a digital menu board does not require a big budget or technical team. With a smart TV or screen, a media player, and a free digital signage platform like PosterBooking, you can set up and manage your own digital menu system in just a few steps.
Let’s walk through how to create a digital menu board that is professional, flexible, and easy to manage.
Step 1: Choose Your Display
Start by deciding what type of screen you want to use for your menu board. This will depend on your space, lighting conditions, and layout.
Popular options include:
- Smart TVs which are affordable, easy to mount, and can connect directly to Wi-Fi
- Commercial-grade digital displays for longer daily use and higher brightness, especially in brightly lit areas
- Multiple screens side by side if you want to separate categories such as drinks, meals, and specials
Mount your screen in a location that is visible to customers at the counter or in the dining area. Make sure it is placed at eye level and away from glare or sunlight.
Step 2: Add a Media Player if Needed
If your screen is not a smart TV or does not support apps, you will need a media player to run the signage software. Some options include:
- Amazon Fire Stick which is cost-effective and easy to use
- Raspberry Pi which is suitable for tech-savvy users or custom setups
- Android TV Box which also works well with signage platforms
Connect the media player to the screen’s HDMI port, power it up, and connect it to your Wi-Fi network.
Create an Account Today and Get 10 screens free for 3 months!
Step 3: Set Up PosterBooking on Your Screen
PosterBooking is a free cloud-based digital signage platform that makes it easy to create and manage digital menus from any device. It is trusted by restaurants in over 100 countries and offers all the tools you need to run your screens smoothly.
Here is how to connect your screen:
- Install the PosterBooking app on your Fire Stick, smart TV, or Android device
- Open the app, and you will see a unique screen code
- On your phone or computer, go to Posterbooking.com
- Sign up for a free account or log in
- Click Add Screen, enter the screen code, and give your screen a name like “Main Menu Display”
- Your screen is now connected and ready to display content
Step 4: Design Your Digital Menu
Now it is time to design your menu content. You can use tools like Canva, Adobe Express, or Photoshop to create your menu boards. Make sure to export them in a standard resolution such as 1920 by 1080 pixels for horizontal screens or 1080 by 1920 for vertical ones.
Tips for effective menu design:
- Use clear and readable fonts
- Stick to high-contrast colors for visibility
- Keep each section well-organized with spacing between categories
- Use appealing images of your food and drinks
- Highlight high-margin items or daily specials
Save each menu screen as an image or short video to upload into your PosterBooking account.
Step 5: Upload Your Menu to PosterBooking
Once your designs are ready, go back to your PosterBooking dashboard and upload them:
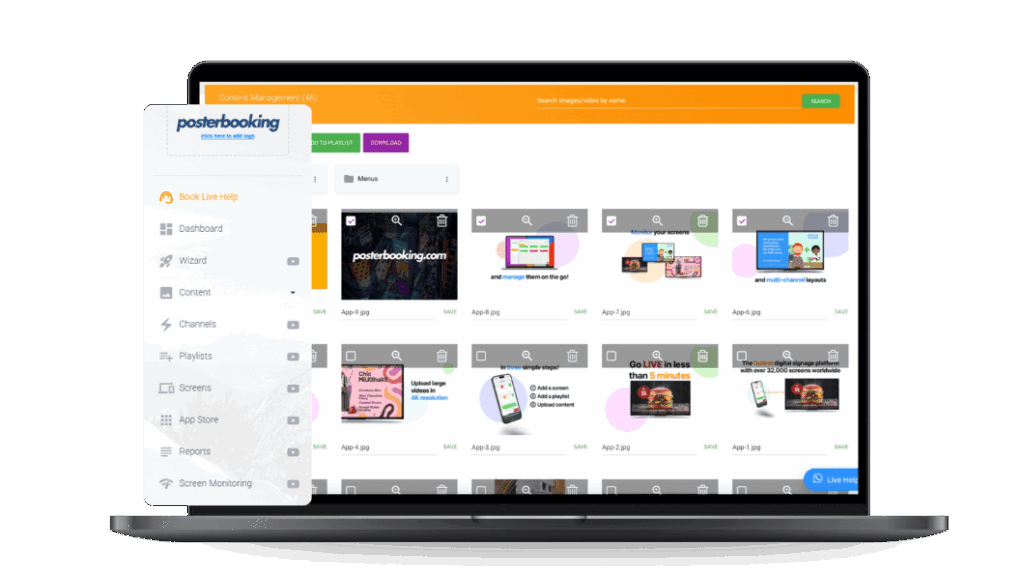
- Click on the Content tab
- Click Upload and select your menu images or videos
- Organize your files using folders if needed
- Click Save
You can upload unlimited content and switch between menus at any time.
Step 6: Create a Playlist
A playlist determines what content will show on your screen and how it will rotate.
- Go to the Playlists tab
- Click Create Playlist and name it something like “Lunch Menu” or “Full Day Rotation”
- Click Add Content, then select the menu images or videos you uploaded
- Set the duration for each item, for example 10 or 15 seconds per screen
- Click Save
This allows you to display a rotating digital menu, or different menus based on time of day.
Don’t Miss Out! Get Access to PosterBooking Now!
Step 7: Assign the Playlist to Your Screen
Now assign the playlist to your connected screen.
- Go to the Screens tab
- Find your screen and click Add or Edit Playlist
- Select the playlist you just created
- Click Save
The content will appear on your screen instantly.
Step 8: Automate with Schedules for Breakfast, Lunch, and Dinner
If your restaurant offers different menus throughout the day, PosterBooking lets you automate when each menu appears.
- Go to your Playlist
- Click Schedule
- Set the start and end time for each content group
- Create multiple playlists like “Breakfast,” “Lunch,” and “Dinner” and assign time slots
This way, your digital menu will change throughout the day automatically, without any manual updates.
Step 9: Keep Your Menus Updated
One of the biggest advantages of digital menus is the ability to make quick changes. Whether you are running a limited-time offer, updating pricing, or removing sold-out items, you can log in to your PosterBooking dashboard and update your menu in real time.
Always make sure your content is current. Customers notice when menus are outdated, and that can hurt their experience.
Why PosterBooking is Ideal for Restaurant Digital Menus in 2025
PosterBooking continues to be one of the best digital signage platforms for restaurants in 2025. It is:
- Completely free to use with no monthly fees for 10 screens.
- Supports unlimited content uploads and screen management
- Allows up to 10 free screens, perfect for restaurants with multiple locations or zones
- Easy to set up, even without technical expertise
- Accessible from any device so you can update menus anytime, anywhere
With tools like playlist scheduling, remote screen control, and cloud content storage, PosterBooking gives restaurant owners full control over their digital menu experience without the cost.
Final Thoughts
Digital menu boards are more than a trend. They help restaurants improve order efficiency, highlight promotions, and create a modern, polished environment for customers. With an affordable screen and a platform like PosterBooking, you can build a menu system that is easy to manage and powerful to use.
Visit posterbooking.com to get started for free and bring your restaurant’s menu to life with digital signage.