
You add music on a digital signage player by uploading audio-enabled content, embedding music within videos, or linking live audio streams through your signage software. While most signage systems focus on visuals like images, videos, and web pages, adding background music transforms your digital signage into a more immersive experience. With PosterBooking, you can combine music and visuals to engage your audience, whether in restaurants, gyms, retail stores, or churches.
This guide walks you step by step through the process of setting up music on your signage player, from preparing your audio files to pairing them with playlists, plus best practices for delivering the best possible customer experience.
Table Of Contents
- Step 1: Gather Your Requirements
- Step 2: Connect Your Digital Signage Player
- Step 3: Upload Music Content
- Option 1: Upload Music Videos
- Option 2: Create a Video Slideshow with Background Music
- Option 3: Add Music Streams via URL
- Step 4: Create a Playlist with Music
- Step 5: Assign Playlist to Your Screen
- Step 6: Test Your Setup
- Step 7: Schedule Music Playlists
- Best Practices for Adding Music
- Why Adding Music Matters
- Final Thoughts
Step 1: Gather Your Requirements
Before you begin, prepare the following:
- A digital signage player Compatible devices include:
- Amazon Fire Stick
- Amazon Signage Stick
- Android TV
- Android tablets or TV boxes
- Raspberry Pi
- A PosterBooking account Sign up at posterbooking.co.uk/login. The free plan supports up to 10 screens, ideal for businesses starting small.
- Your audio content Since PosterBooking focuses on video/image display, your best options for adding music are:
- Music videos in MP4 format
- Custom video slideshows with background music embedded
- Streams of music radio stations or online audio feeds through website URLs
- Stable internet connection Especially important if you plan to stream music feeds or online playlists.
By gathering these requirements first, you avoid interruptions and ensure a smooth setup.
Step 2: Connect Your Digital Signage Player
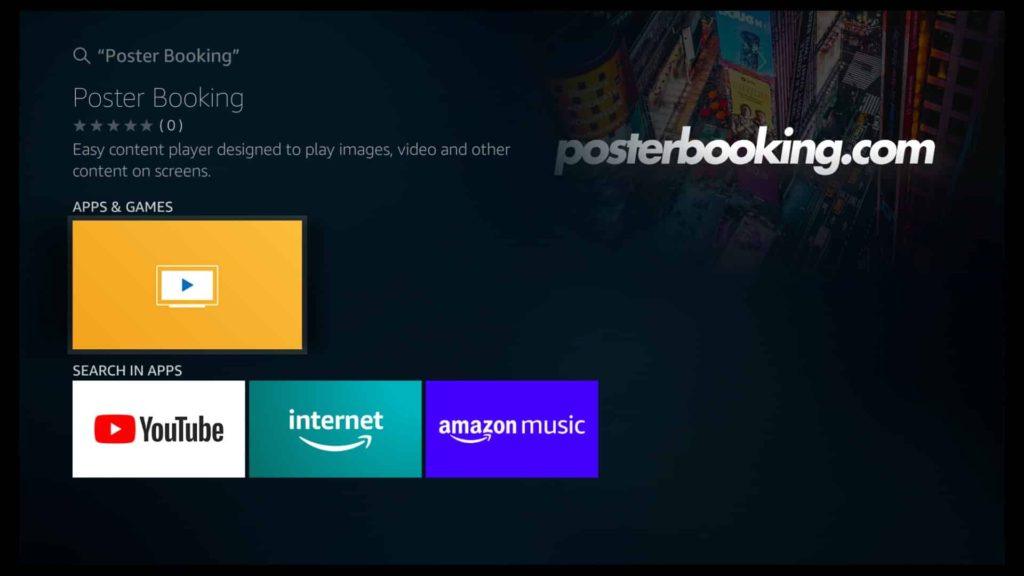
To play any content - including music - your device must be linked to PosterBooking:
- Install the PosterBooking app on your Fire Stick, Android TV, tablet, or Raspberry Pi.
- Launch the app; it will display a unique code on your screen.
- On a separate computer or phone, log in to posterbooking.co.uk/login.
- Click Screens → Add Screen, then enter the code and give the screen a name like “Store Music Display.”
- Save it, and your signage player is now connected to your dashboard.
This connection allows you to upload and control music-enabled content remotely.
Step 3: Upload Music Content
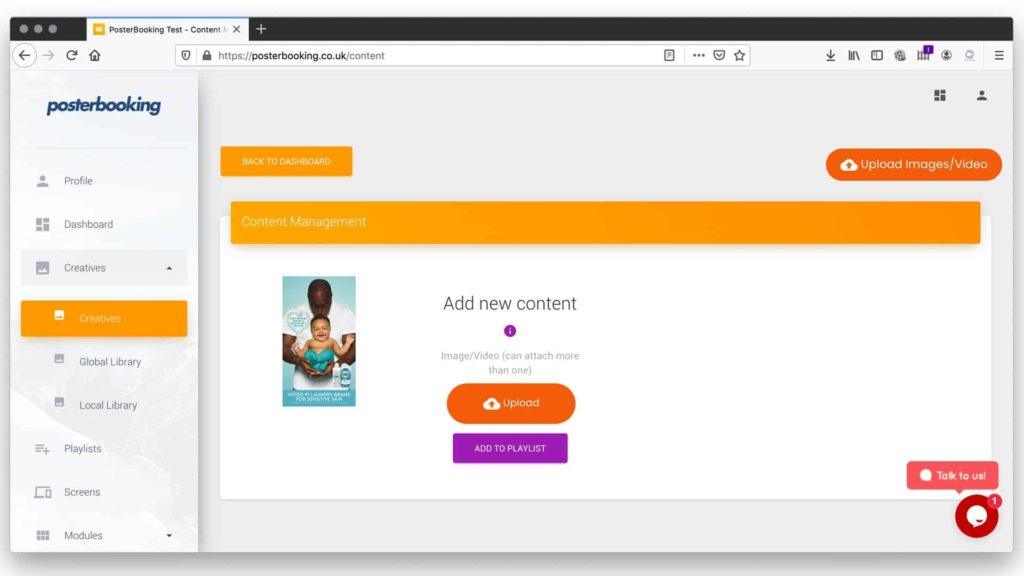
PosterBooking doesn’t support standalone MP3 audio files, but you can add music in the following ways:
Option 1: Upload Music Videos
- Convert your music into MP4 format (or download ready-made music videos).
- Go to Content → Images/Videos in the PosterBooking dashboard.
- Upload the MP4 files.
- Once uploaded, they appear in your library, ready for playlists.
Option 2: Create a Video Slideshow with Background Music
- Use a free editor like Canva, iMovie, or Adobe Express to combine images and background music.
- Export the project as an MP4 video.
- Upload it into PosterBooking under Images/Videos.
This approach works well if you want branded visuals (like menus or promos) running alongside background tracks.
Option 3: Add Music Streams via URL
- Navigate to Content → Websites in your dashboard.
- Paste the URL of a live streaming station or online playlist. Examples: internet radio streams or Spotify public playlist embeds.
- Save it with a descriptive name (e.g., “Jazz Radio” or “Lo-Fi Playlist”).
This option streams music live while using your screen for visuals.
Step 4: Create a Playlist with Music
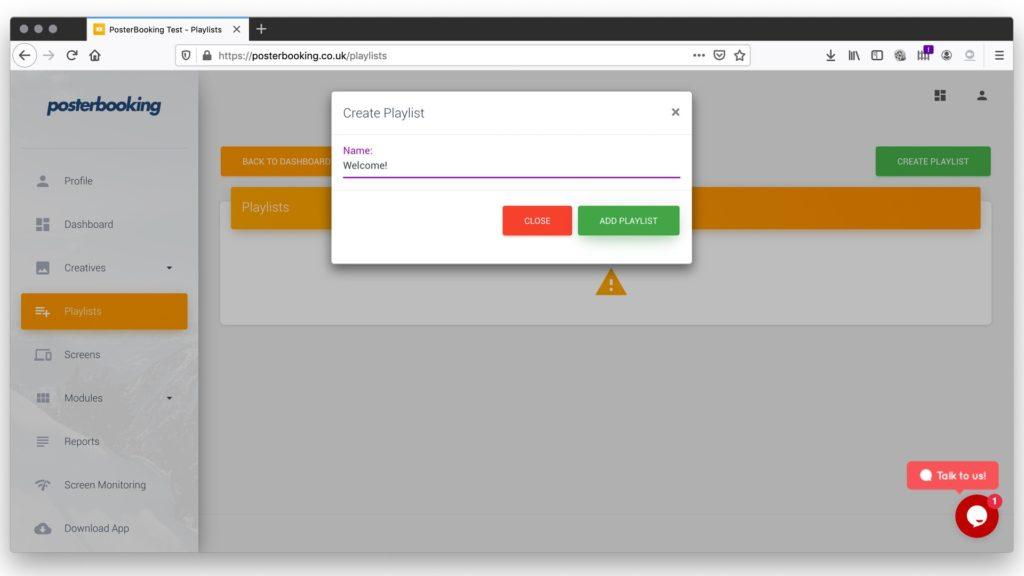
Once your music content is uploaded, you need to organize it:
- Go to the Playlists tab.
- Click Create Playlist and name it (e.g., “Store Music Mix” or “Gym Motivation”).
- Add your music videos, slideshows, or music-streaming URLs to the playlist.
- Adjust durations:
- Music videos usually run for their full length.
- For URL streams, set a long duration (like 30–60 minutes) to allow continuous playback.
- Save your playlist.
This playlist will now serve as your audio-enabled content bundle.
Step 5: Assign Playlist to Your Screen
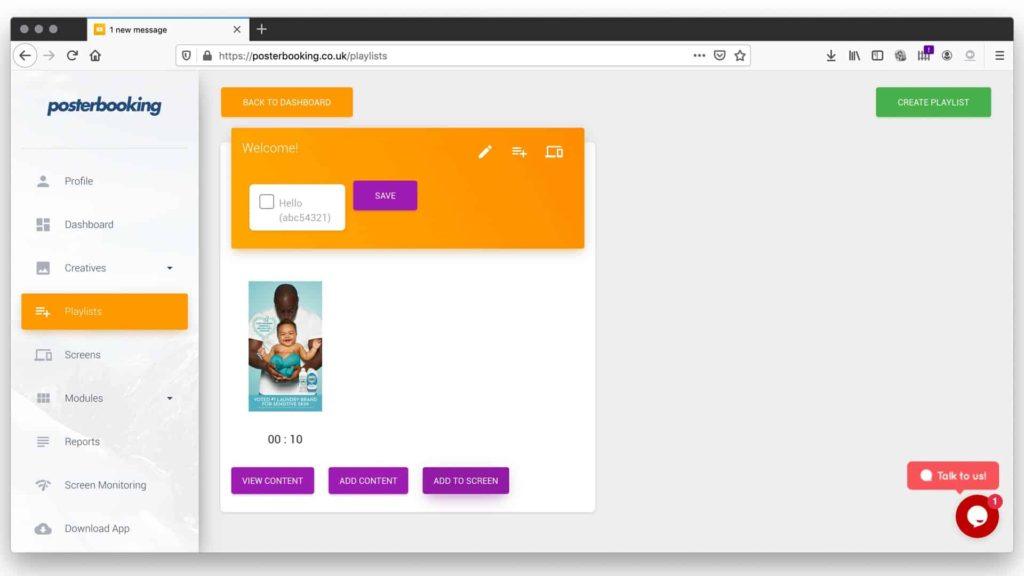
With your playlist ready:
- Go back to the Screens tab.
- Locate your signage player (the Fire Stick, Android TV, etc.).
- Click Add/Edit Playlist.
- Select your music-enabled playlist.
- Save it.
Your device will update, and music will start playing on the connected screen with visuals.
Step 6: Test Your Setup
Testing ensures your audio works smoothly:
- Check volume levels: Use your TV or external speakers to adjust sound to a comfortable level. Background music should support the atmosphere without overpowering conversations.
- Confirm content order: Verify that music videos or audio slideshows run as expected.
- Test streaming stability: If you added an online stream, check that it plays without interruptions. Weak Wi-Fi could cause buffering.
- Review time zones: If you’re scheduling playlists (e.g., morning music vs. evening music), confirm your account’s time zone matches your local one.
Step 7: Schedule Music Playlists
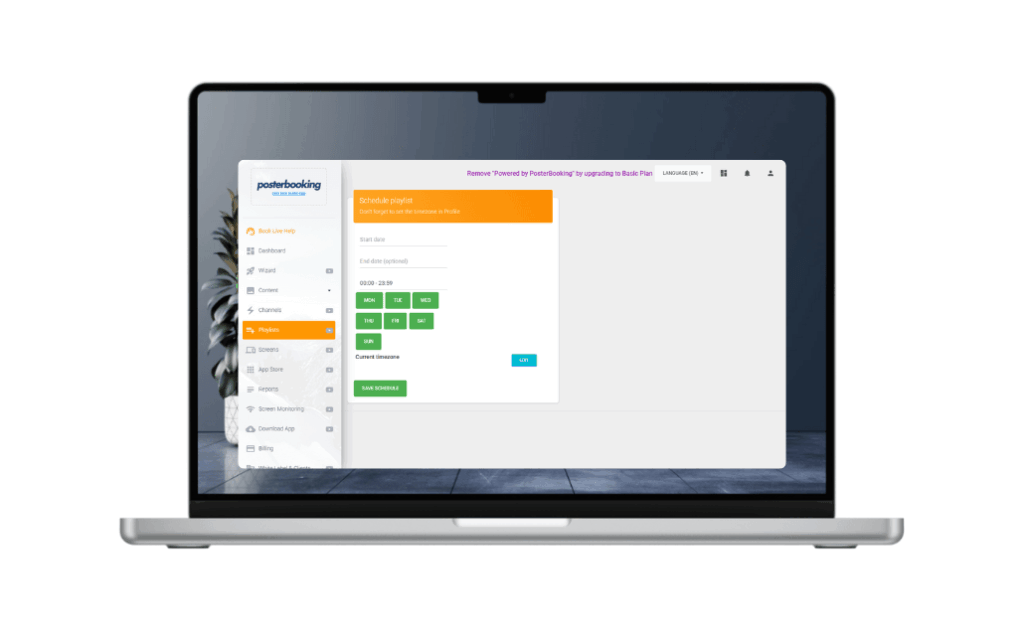
One of the biggest advantages of digital signage is automation. Instead of playing the same music all day, schedule playlists by time:
- Morning → Chill or acoustic tracks.
- Afternoon → Energetic playlists.
- Evening → Relaxing or closing-time music.
To schedule:
- Go to Screens → Schedule.
- Add the playlist you want.
- Set start and end times for each part of the day.
- Save the schedule.
The signage player will automatically switch music playlists at the times you define.
Best Practices for Adding Music
- Match music to your environment
- Retail stores benefit from upbeat tracks.
- Gyms thrive on high-energy playlists.
- Cafés and restaurants work best with mellow, acoustic, or jazz.
- Use licensed music Always ensure your music is licensed for commercial use to avoid copyright issues. Consider royalty-free providers or business licensing services.
- Balance visuals and sound Pairing branded slideshows with subtle background music often works better than running music videos alone.
- Keep playlists fresh Rotate tracks regularly. Customers and staff will notice if the same songs repeat endlessly.
- Test sound zones For larger spaces, test music volume in different corners to avoid dead spots or overly loud areas.
Why Adding Music Matters
Adding music to your digital signage player isn’t just about entertainment. It directly influences customer behavior and brand perception:
- Boosts engagement: Studies show customers spend more time in stores with background music.
- Improves atmosphere: A gym feels motivating with energetic beats, while a café feels cozy with acoustic tunes.
- Reinforces branding: Music style communicates brand personality just like visuals do.
- Encourages repeat visits: A pleasant ambiance keeps customers coming back.
Digital signage without sound is only half the experience.
Final Thoughts
You add music on a digital signage player by uploading music videos, embedding audio into visual slideshows, or linking live audio streams in your signage dashboard. With PosterBooking, the process is simple: connect your device, upload content, create playlists, assign them to screens, and test your setup.
The key is planning: choose the right type of music, balance it with visuals, and schedule playlists to match the mood of the day. When done well, your signage transforms from a static display into a full sensory experience that enhances your business environment.
With PosterBooking offering 10 free screens, you can experiment with music integration risk-free, then scale across multiple devices once you’ve found the perfect setup.