
How to set up digital signage screens on an Amazon Fire TV Stick
A super-quick setup guide
Your first 10 screens are completely FREE!
Please note: As of April 2026, New Amazon Fire TV sticks run on Vega OS, and is not compatible with PosterBooking. This page only serves as guidance for Fire TV sticks running on the older Fire TV Operating System. We recommend using the Amazon Signage Stick as an alternative.
Here's what you will need:
A HDTV Monitor/Any TV
(with HDMI input)
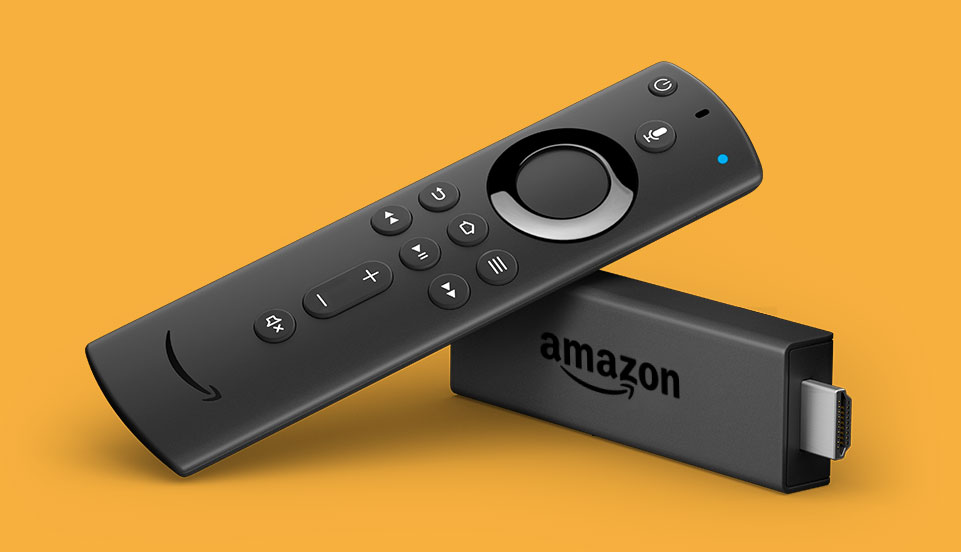
An Amazon Fire TV Stick Player
(We recommend a 4K Amazon Fire TV Stick).
Internet Connection
To upload and update content
Before you get started, plug your media player into your TV/Monitor and connect the player to the internet.
Step 1:
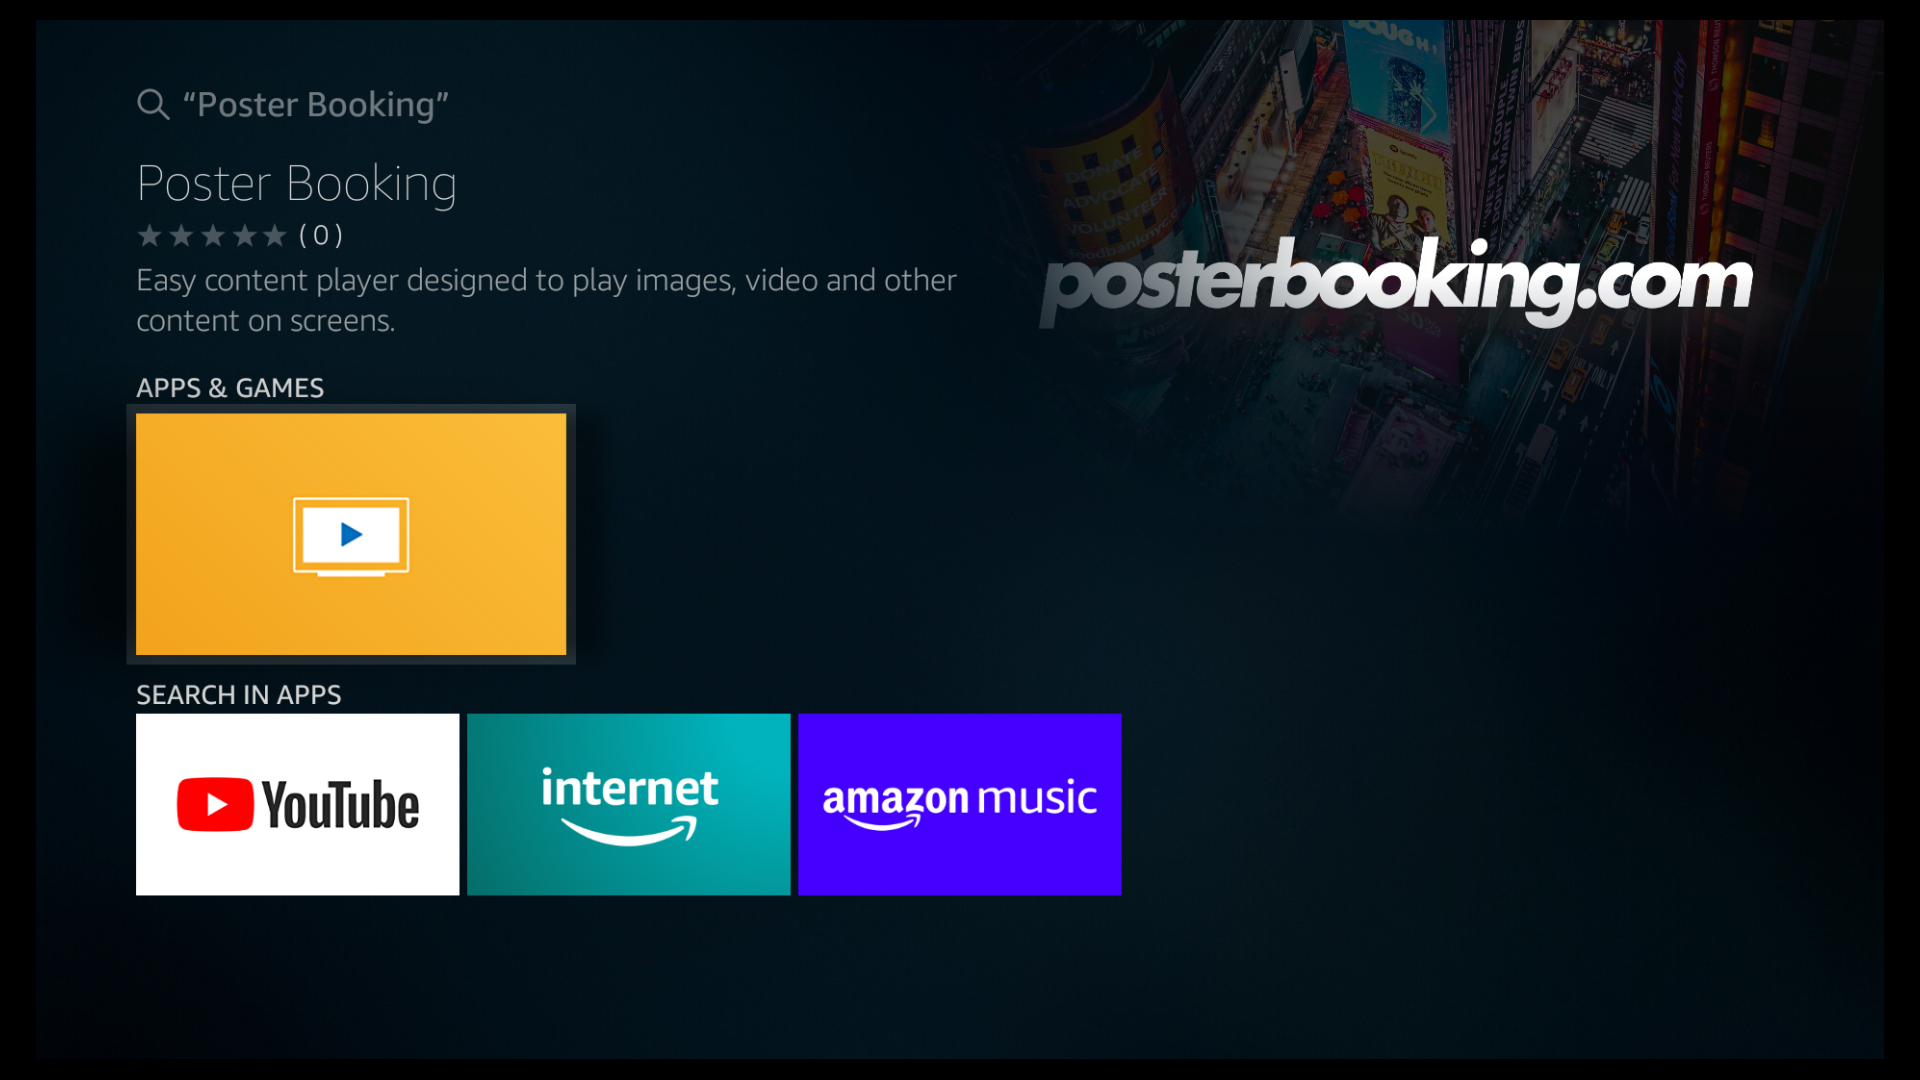
Once you have connected your FireStick to the internet, click on the Search icon on the navigation bar. Search for "Poster Booking" in the Amazon Fire App Store and download the app.
Step 2:
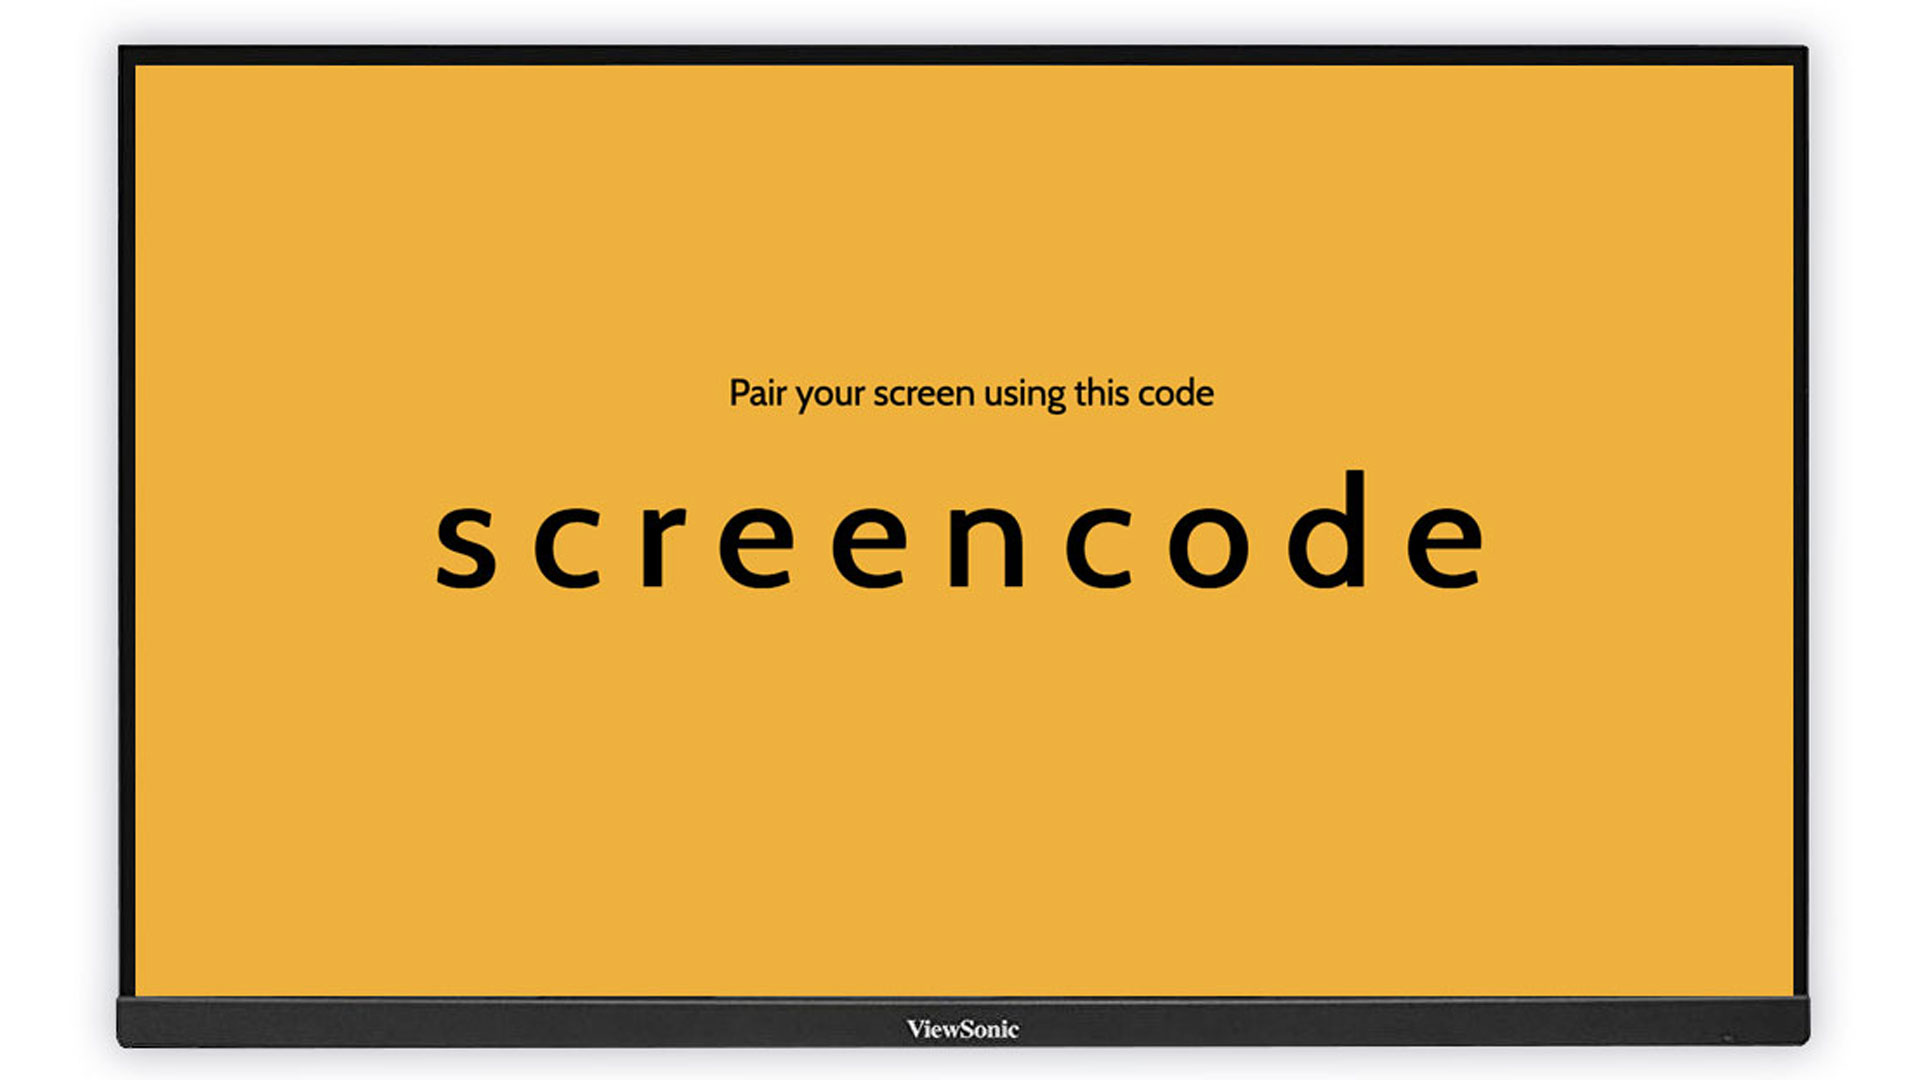
Launch the Poster Booking app. You will see an 8-digit code on the screen, keep a note of this code.
Step 3:
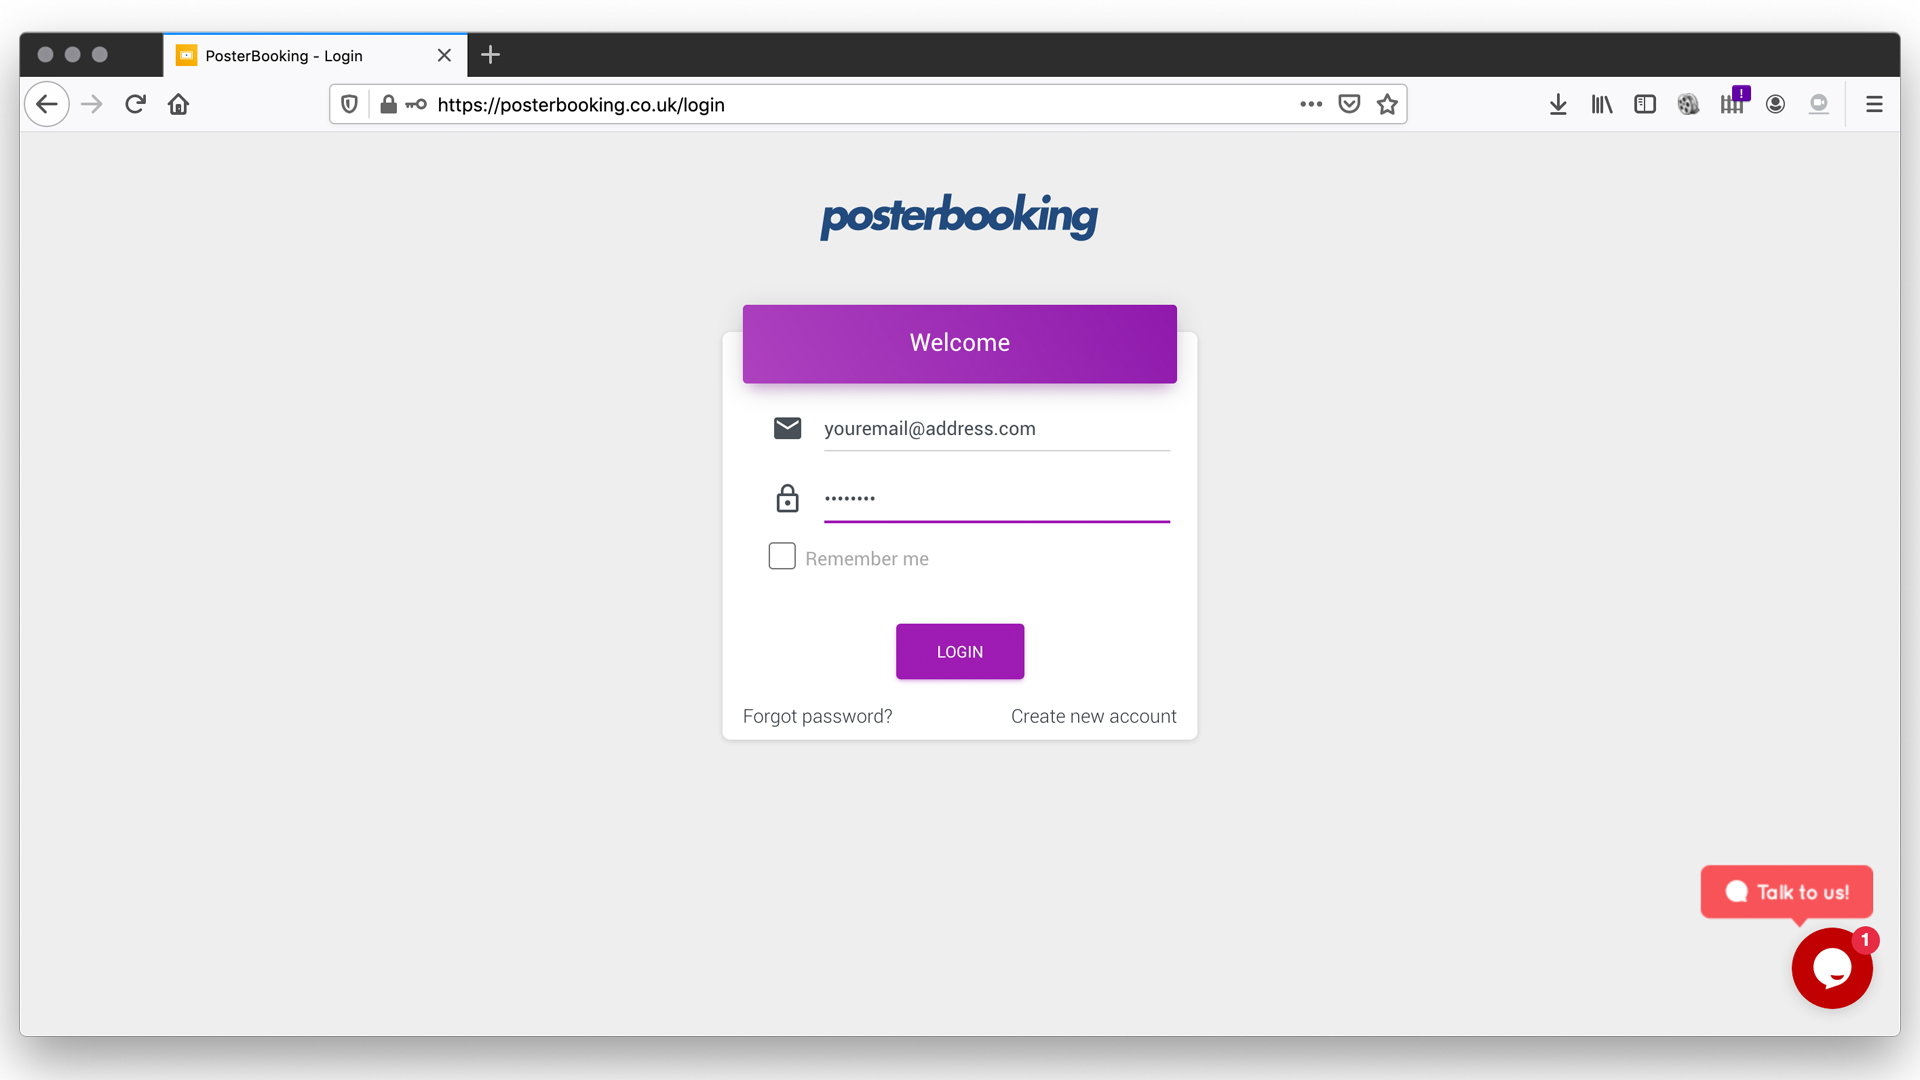
On a separate device, Log in to the Poster Booking Dashboard. If you haven't created an account, you can do so. Once you have logged in you can start creating your first screen, and add content.
You can do the next steps in any order, but we'll show you the quickest way. First we will upload creatives, then create a playlist, and finally we will add a screen.
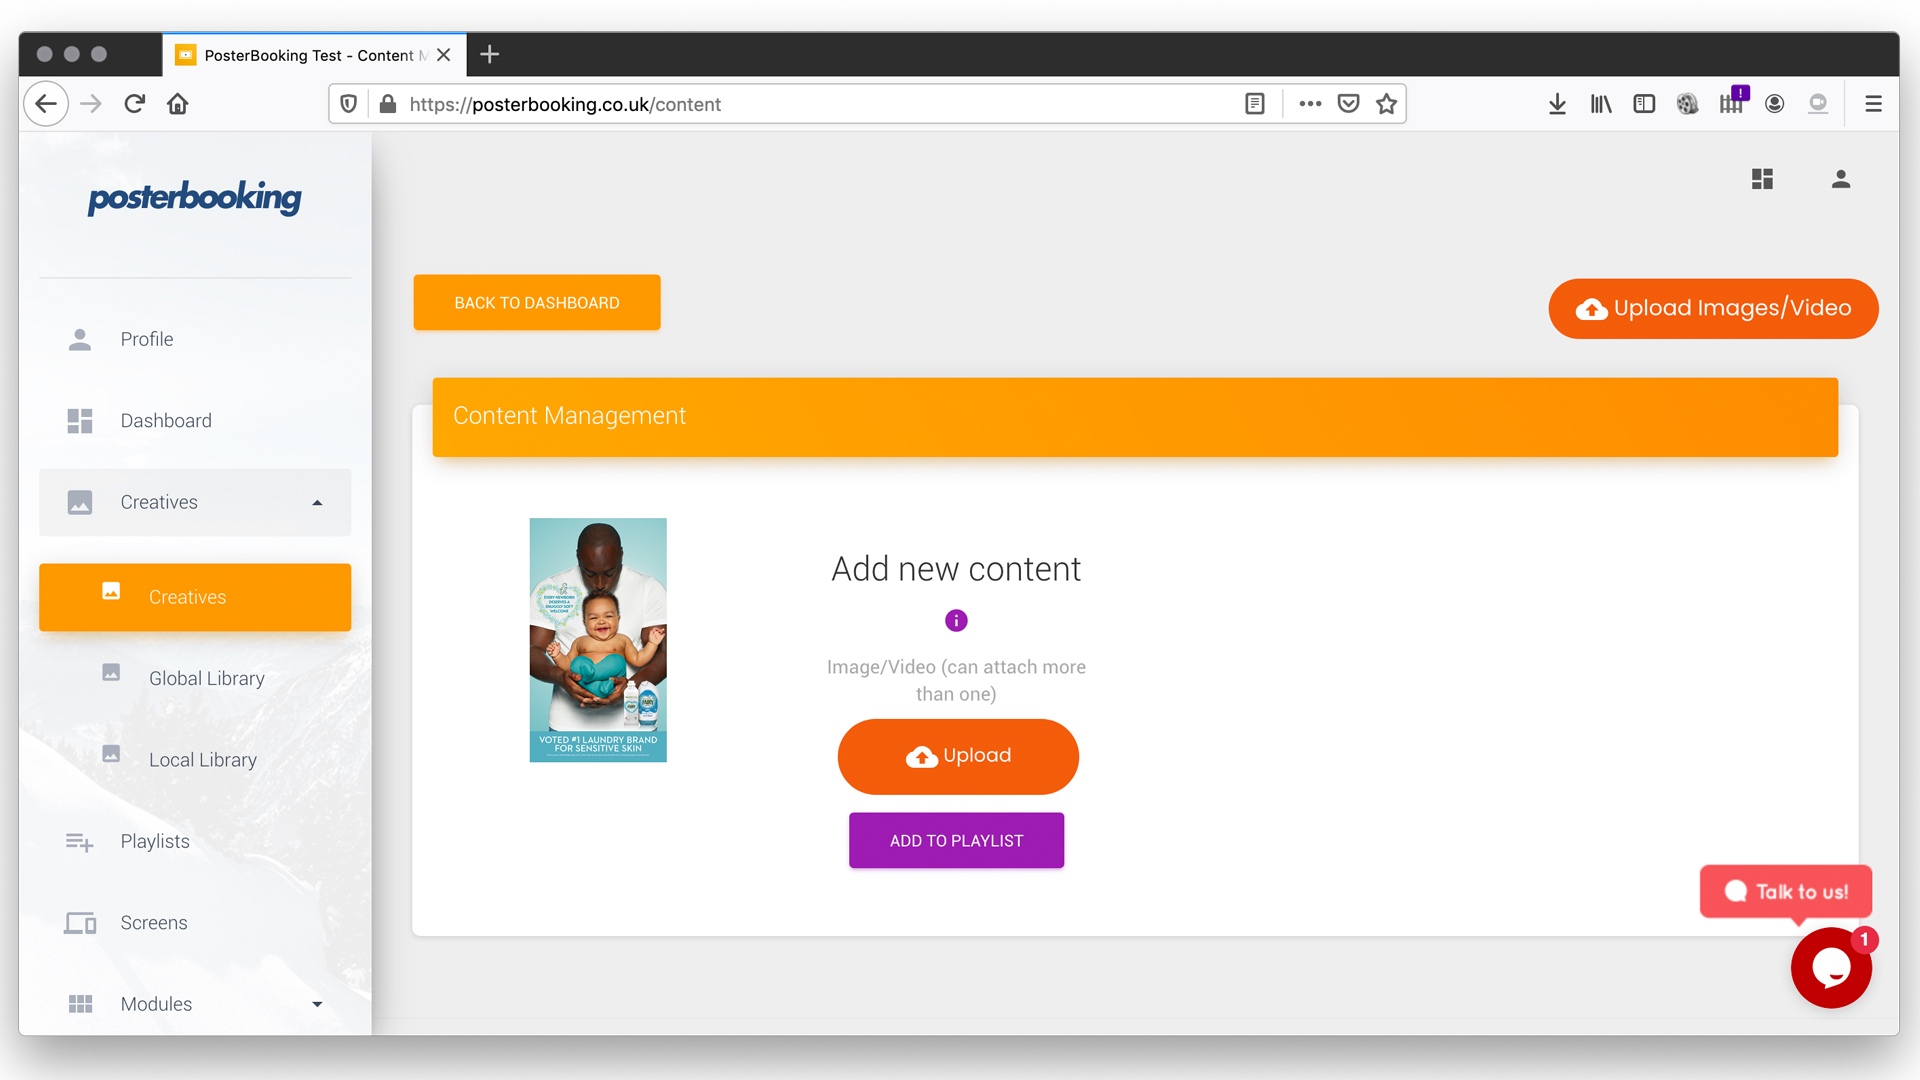
Step 4 (Adding Content):
Click on " Add content" from the dashboard or "Creatives" on the left hand panel, and then "Upload Images/Videos". Choose you content which you wish to display.
Recommended Image/Video Dimensions: 1920 x 1080 pixels Maximum Content Size: 30MB (Upgrade to 300mb) Recommended Image Format: .JPG, .PNG Recommended Video Format: .MP4
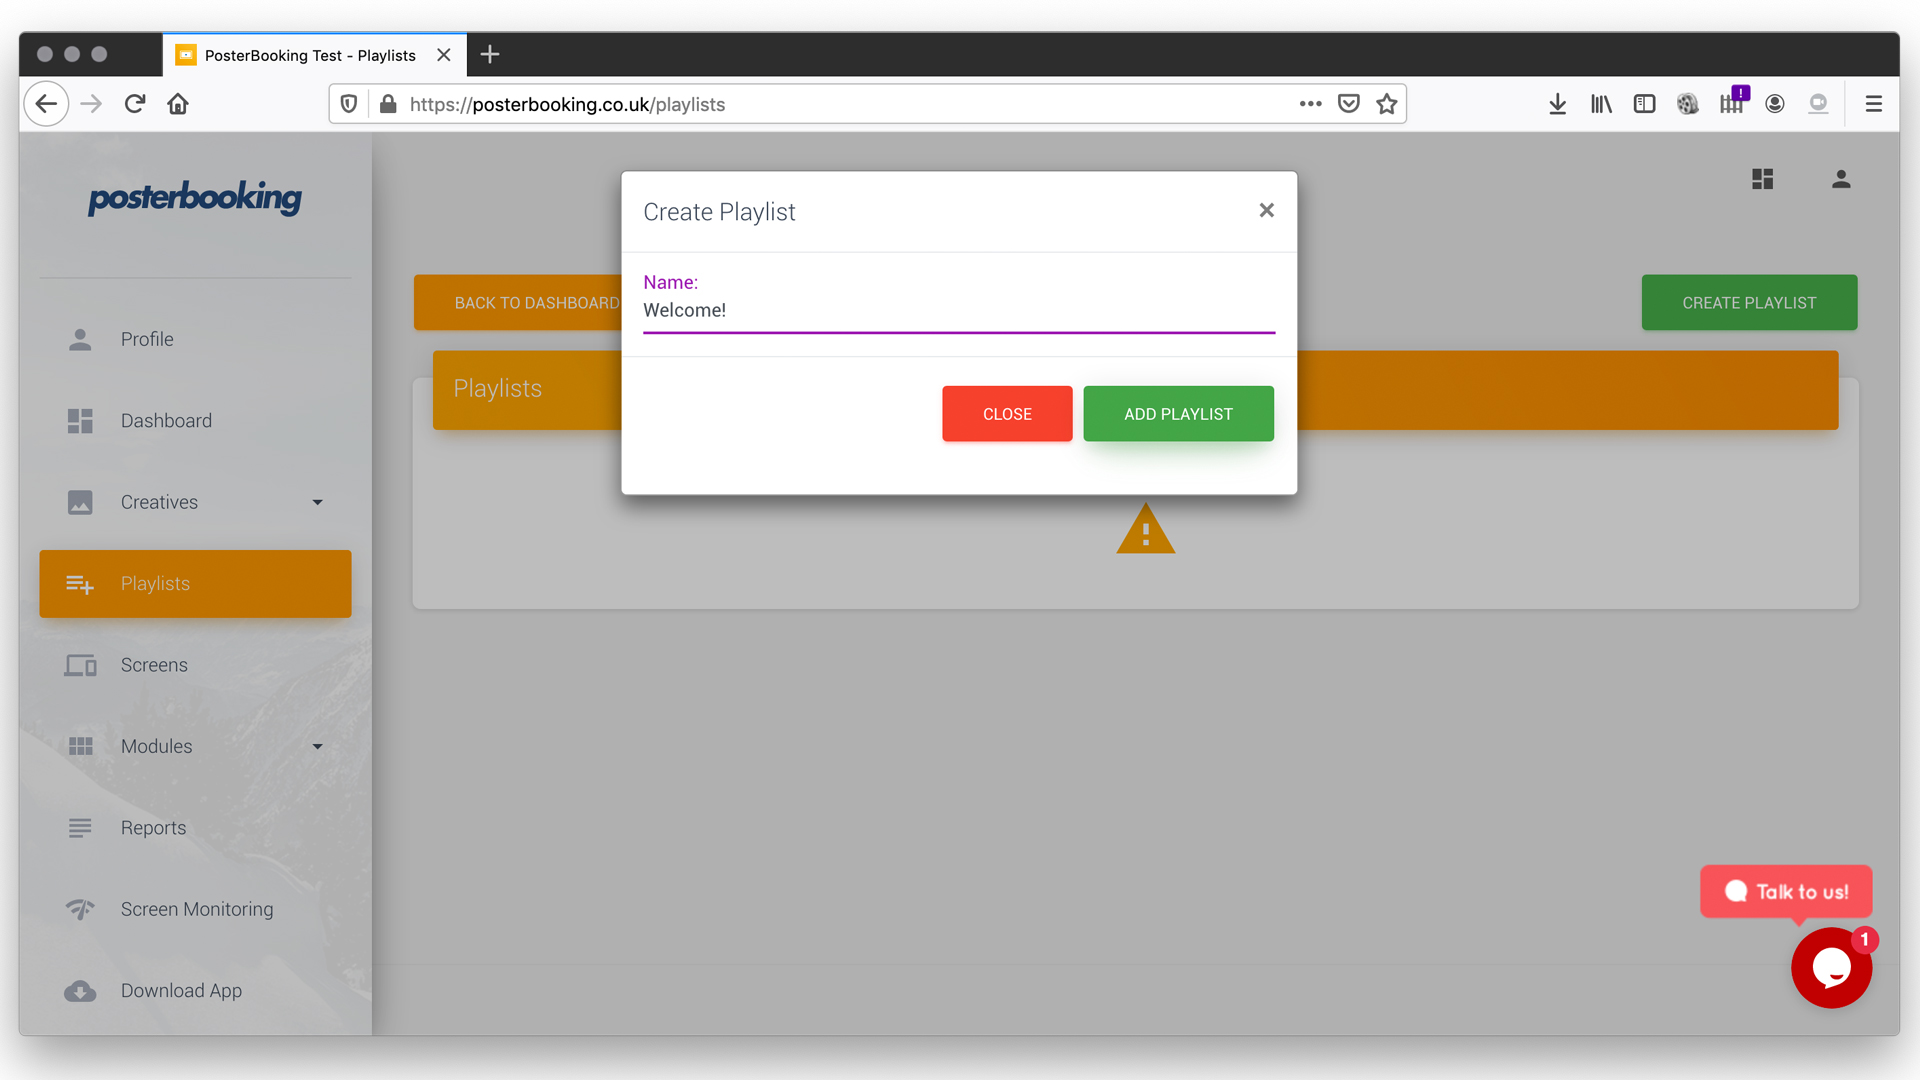
Step 5 (Creating Playlists):
Next, you will need to create a playlist. Click on " Playlists" on the left hand panel then create a new playlist, and give it a name.
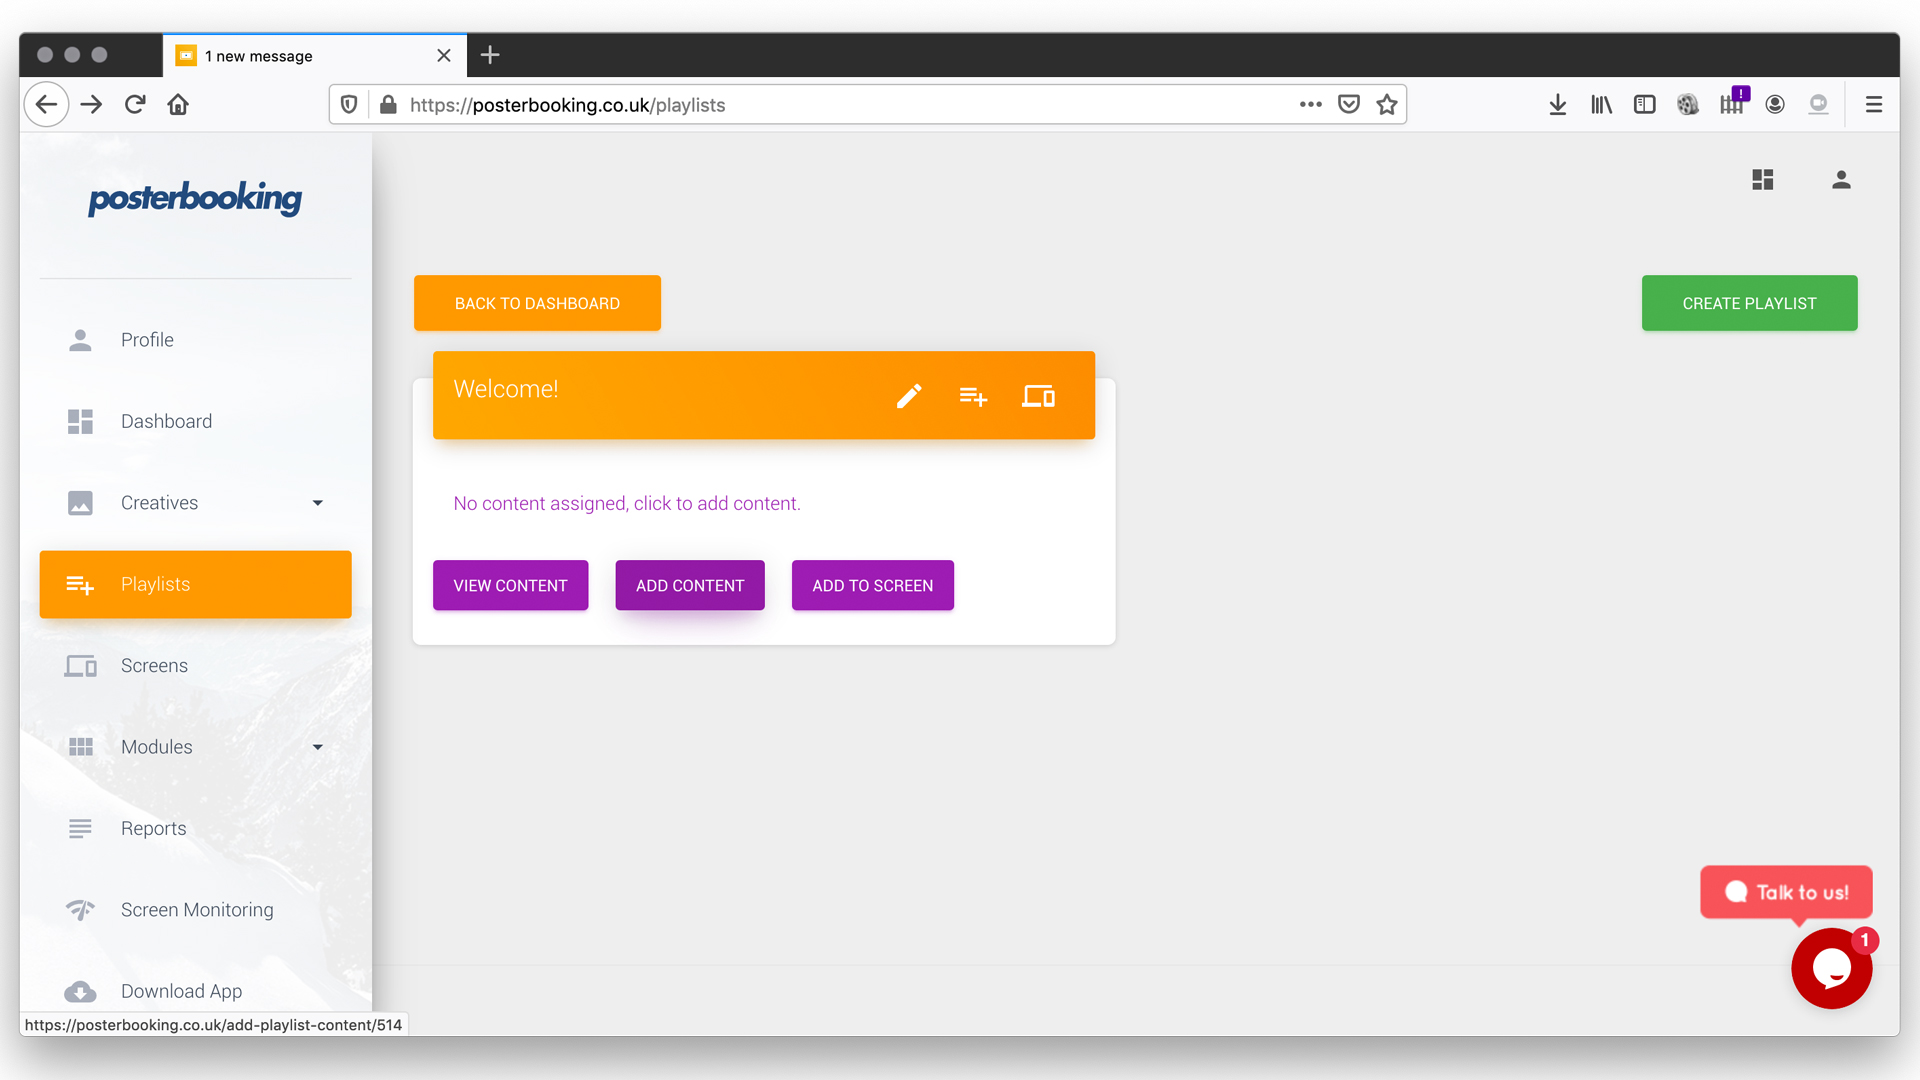
Step 6 (Playlists):
Once your playlist has been created, you will then need to add your content to the playlist. Click on the "Add Content" button and choose the images/videos you wish to be displayed. Now that your playlist is ready, it's time to add a screen!.
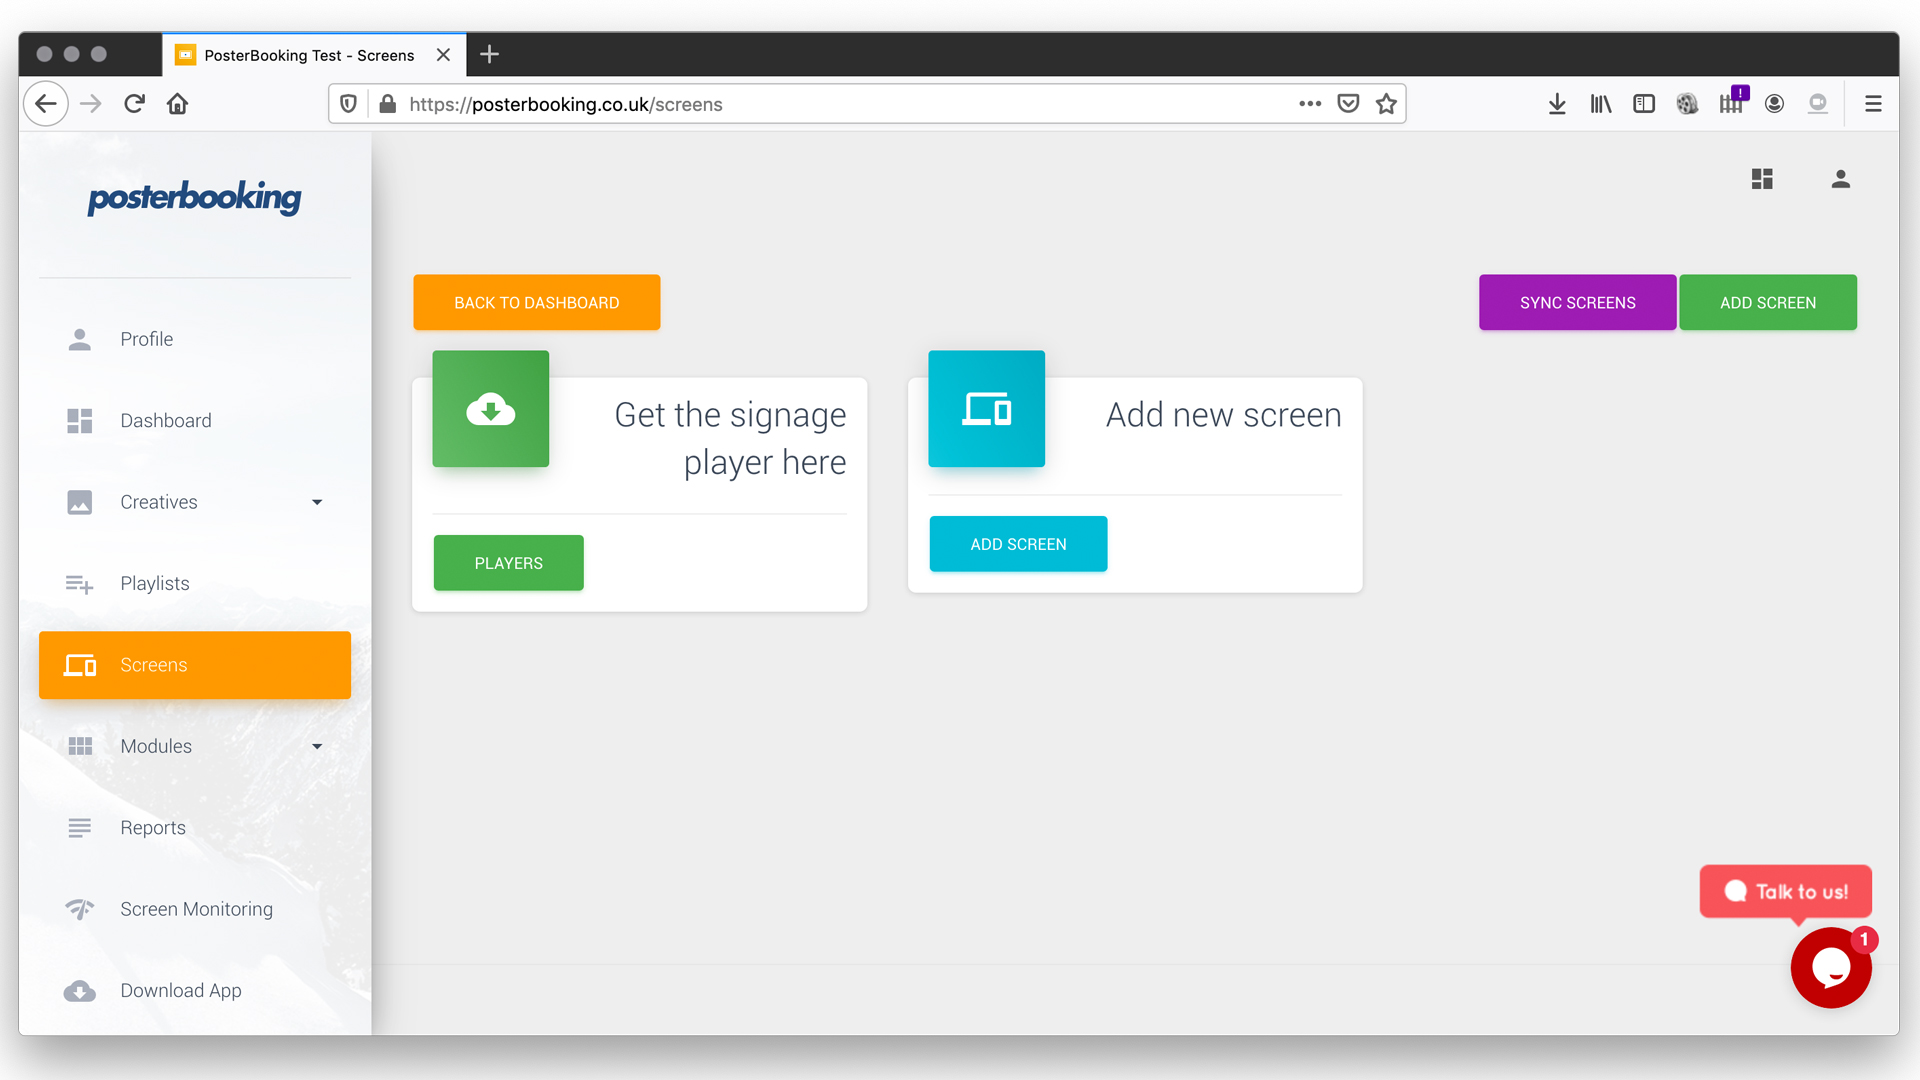
Step 7 (Adding a Screen):
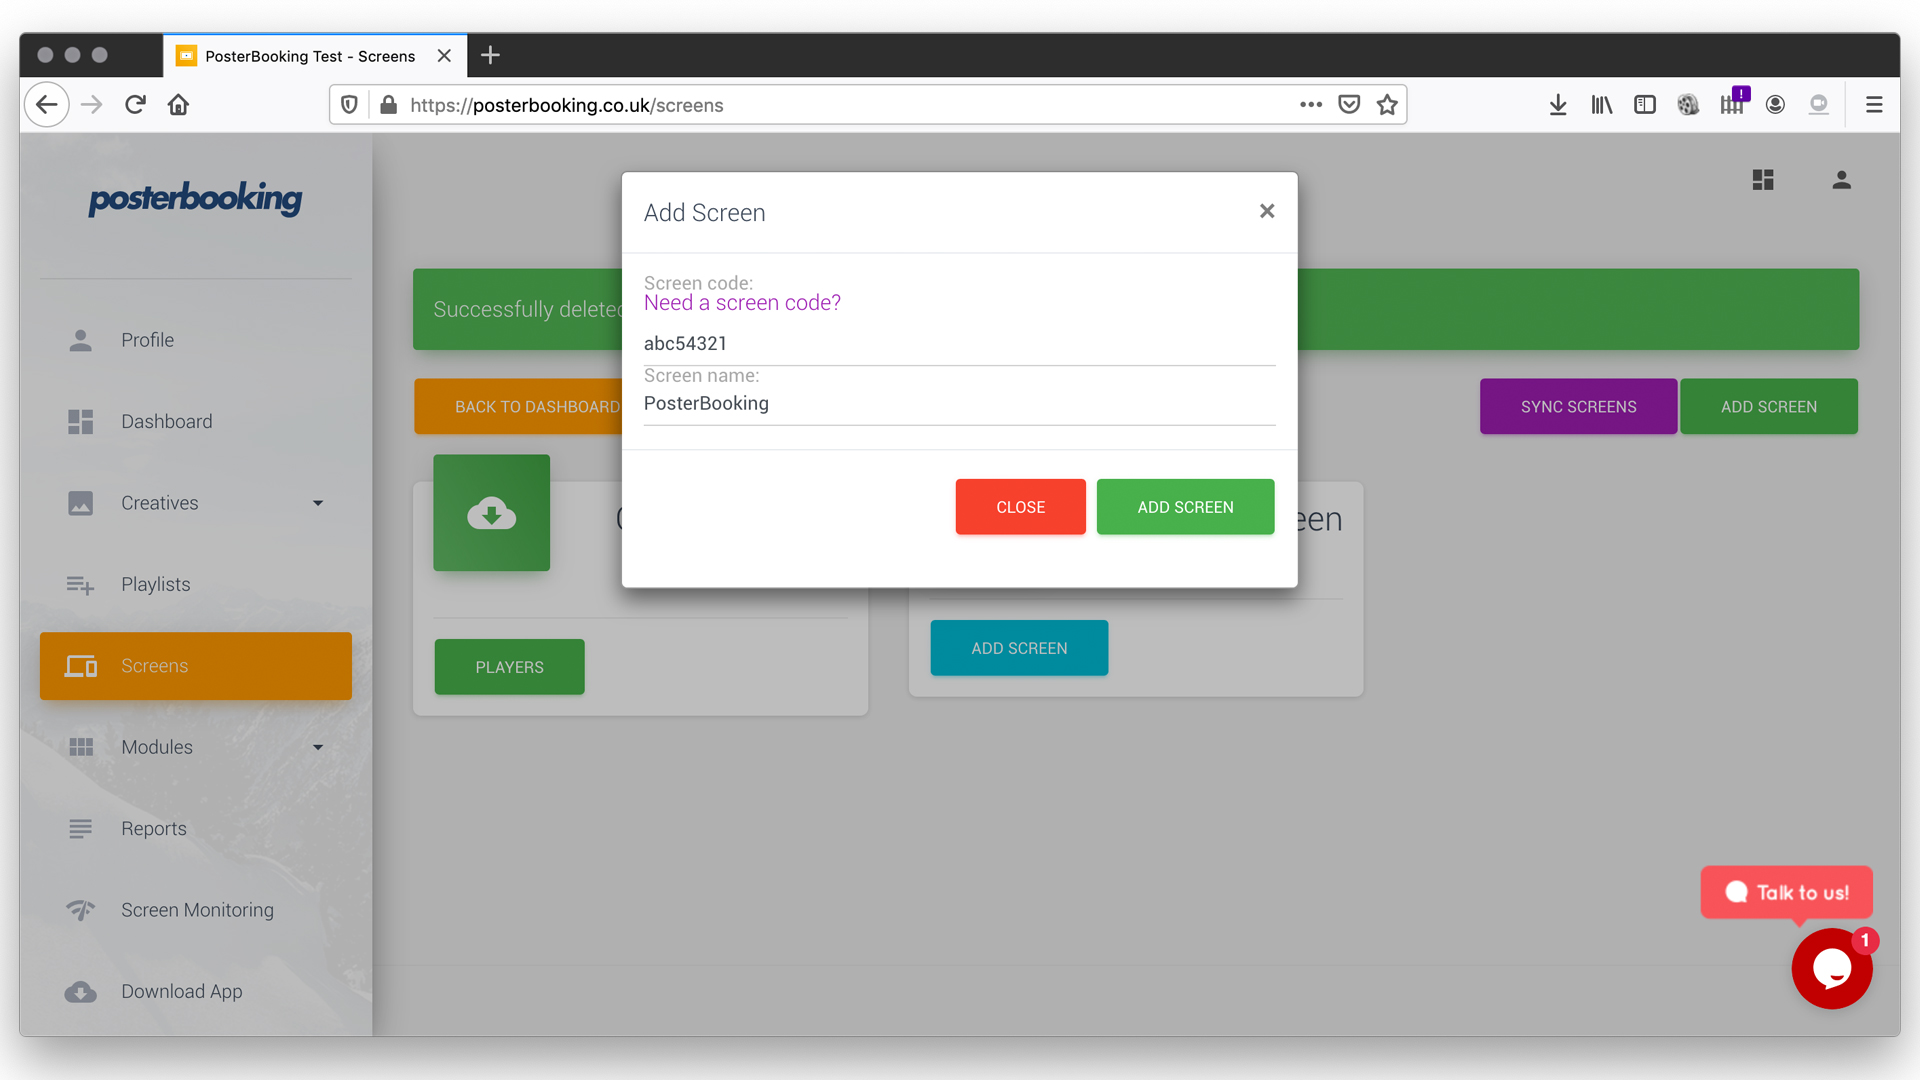
Click on " Screens" on the left hand panel, or "Add a screen" from the dashboard. This will go to a new page, and you will see two options. Click on "Add New Screen"
Step 8 (Adding a Screen):
A pop-up will appear and prompt you to add a screen code. This is the code that is being displayed on your digital screen. Give your screen a name. This is very useful if you intend on having multiple screens. You can name them by the location of where you place your screens, which will make it easier for you to upload the right content, on the right screens.
Step 9 (Assign Playlist):
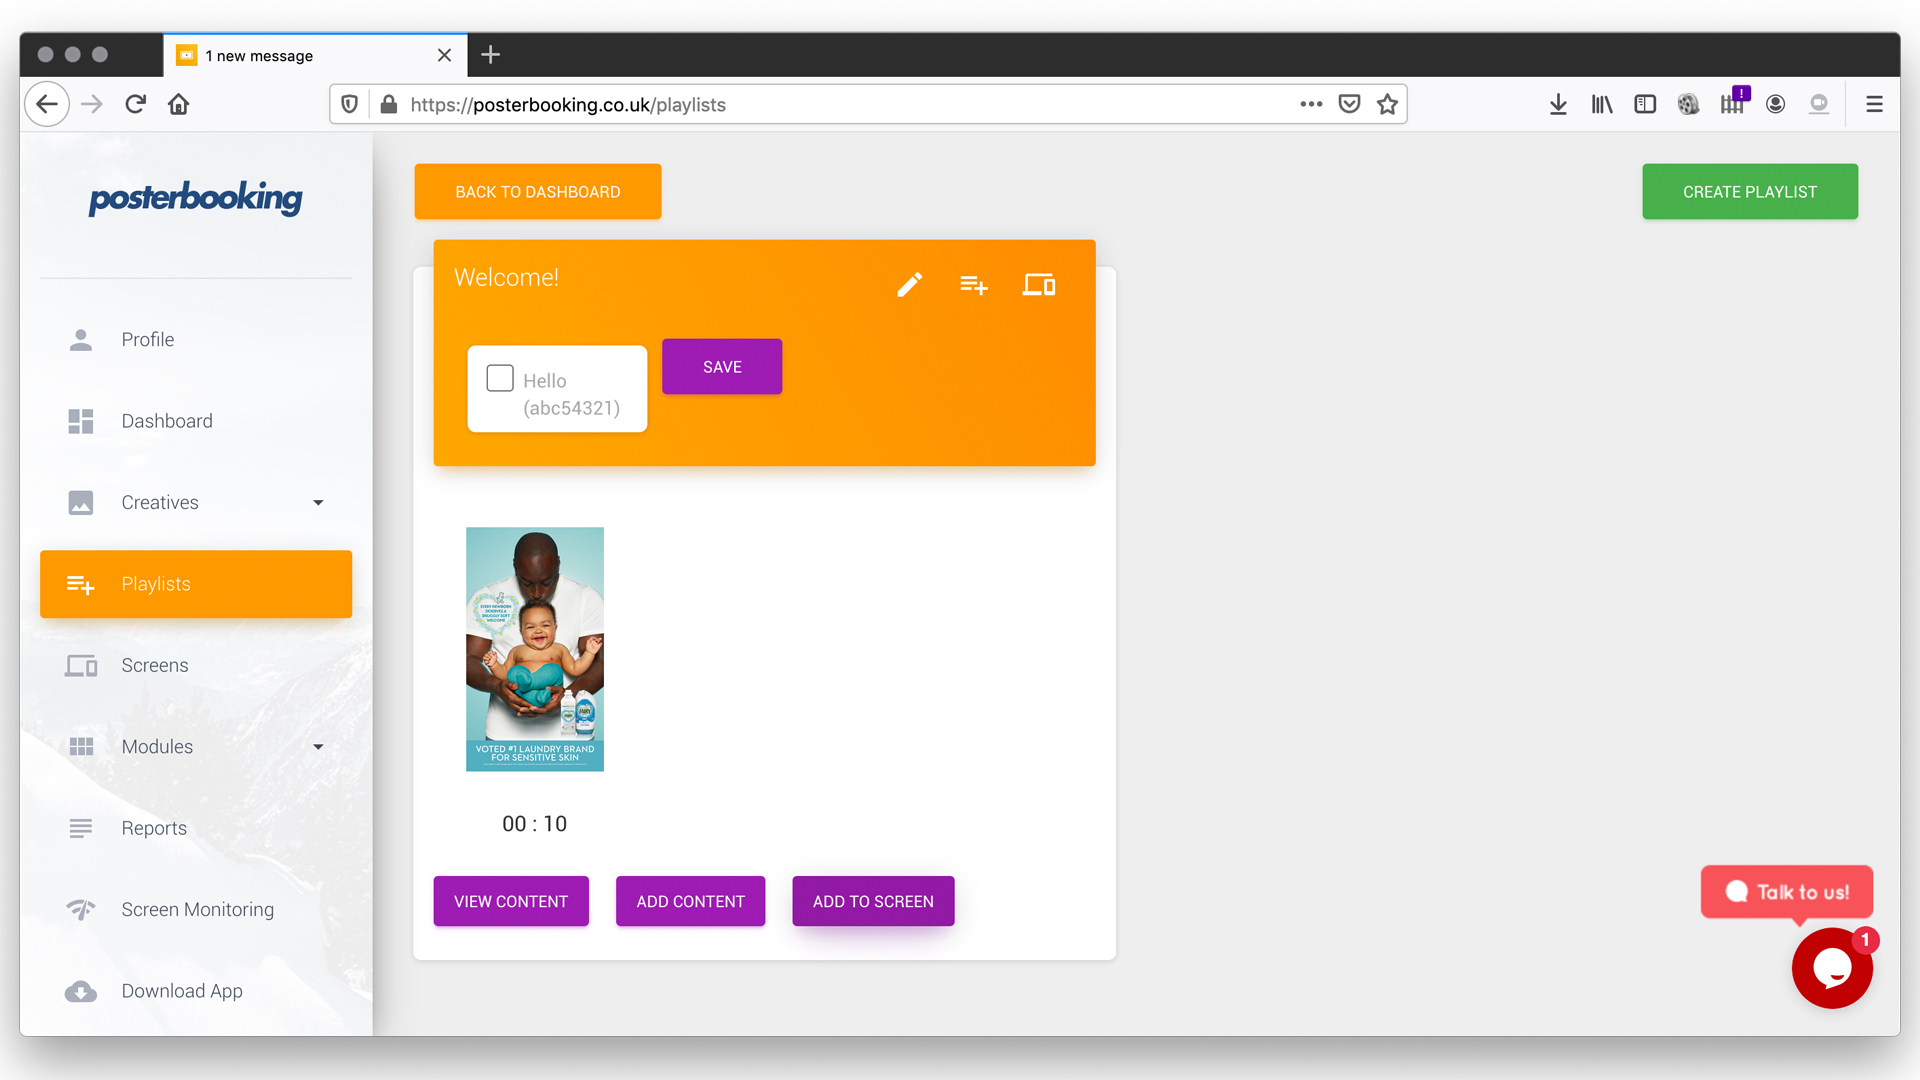
The Final step!! In order for your screen to display the content, you will need to assign the playlist you created earlier. Go back to the playlist page, and choose your playlist. Click on the "Add to Screen" button and select the screen you want it to be displayed on
Your screen is now live!
Display signage live in less than 2 minutes
Seconds to sign up. Seconds to add a screen. Seconds to add content and go live!